Want to learn how to create latte art? It's more than just a pretty pattern; it’s the result of pouring perfectly steamed, silky milk—what baristas call microfoam—into a rich shot of espresso. It's a skill that turns a simple coffee into something special.
This guide will show you how to get started, breaking down the process into simple, practical steps. With the right gear and a bit of practice, anyone can learn to pour designs that will impress.
Your Journey into the World of Latte Art
Learning to pour latte art changes your relationship with coffee, turning a daily routine into a genuine craft. There’s something incredibly rewarding about combining precision and creativity to make something beautiful.
This guide will take you from a curious coffee drinker to a budding latte artist. We’ll break down everything you need to know, covering:
- The essential tools you'll need to get started.
- How to pull the perfect espresso shot—your canvas.
- The secret to steaming glossy, paint-like microfoam.
- Step-by-step instructions for the foundational patterns.
- Troubleshooting the common mistakes we all make.
The UK's speciality coffee scene has exploded, making latte art more visible than ever. The demand for high-quality, espresso-based drinks has pushed both cafes and home baristas to up their game.
The secret to great latte art isn’t just in the pour. It’s about nailing every step that comes before it. The quality of your espresso and the texture of your milk are the true foundations.
To begin, you’ll need a few key bits of kit. A quality espresso machine and a good milk jug are non-negotiable, but having a complete set of tools makes the learning process much smoother. A professional Motta Napoli Barista Kit gives you the right gear for consistency from day one.
How to Create Latte Art: The Essential Toolkit

Before you start pouring, let's talk tools. Getting the right equipment is the most important first step in learning how to create latte art. While passion and practice are the secret ingredients, your tools will either help you or hold you back.
A great setup doesn't just make the process easier; it gives you the consistency you need to hone your skills. For a barista, a quality espresso machine with a proper steam wand is non-negotiable. This is the heart of your station, creating both the espresso canvas and the silky microfoam.
Your Core Coffee Equipment
Your journey begins with two key items: the espresso machine and a good grinder. They work together to produce the perfect shot of espresso, which is the foundation for any decent latte.
Espresso Machine with a Steam Wand
The machine’s ability to produce consistent pressure for espresso and powerful, dry steam for milk is vital. We always point people towards machines from trusted brands because they deliver the professional-grade performance needed for texturing perfect milk, every single time.
A Quality Burr Grinder
Fantastic espresso starts with a fantastic grind. A burr grinder is essential because it crushes beans into uniform particles, which is key for an even extraction. Blade grinders smash beans into inconsistent bits, leading to weak or bitter espresso with a thin crema that won't support your art.
Specialised Tools for Precision Pouring
With your main hardware sorted, a few smaller accessories will turn good milk into great art. These tools are all about control, precision, and consistency.
-
Milk Jug: The size and shape of your jug matter. A jug with a well-defined spout gives you precise control over the flow of milk. For beginners, a 500ml size is often the sweet spot, providing enough room to create a vortex. An option like the Motta Tulip Milk Jug can sharpen your pouring accuracy.
-
Digital Scales: Precision is everything. Weighing your coffee grounds ensures you use the exact same amount for every shot, which is crucial for consistent espresso. Trying to hit a specific recipe (18g of coffee in for 36g of espresso out) is impossible without them.
-
Milk Thermometer: Steaming milk to the right temperature (around 60-65°C) is critical. Go too hot, and you'll destroy the milk's natural sweetness and ruin the texture. A simple clip-on thermometer gives you real-time feedback, helping you stop the steam at the perfect moment.
Don’t underestimate the small stuff. A clean cloth for your steam wand and another for your work surface are just as essential as the machine itself. A clean, organised station leads to a clear mind and a steady hand.
Essential Latte Art Equipment Checklist
Here's a quick rundown of the must-have tools for creating latte art. Having these items ready will make your practice sessions far more effective.
| Equipment | Why It's Essential | Top Recommendation |
|---|---|---|
| Espresso Machine | Provides the espresso "canvas" and the steam for texturing milk. | 1. ADS Coffee Supplies (Explore our range of professional machines) |
| Burr Grinder | Ensures a consistent grind for a balanced espresso shot with rich crema. | Check out our leading grinder brands. |
| Milk Jug | A sharp spout gives you the control needed for detailed pouring. | The Motta Tulip Milk Jug is a fantastic choice. |
| Digital Scales | Crucial for weighing your coffee dose to achieve consistent espresso. | We stock a variety of barista-grade digital scales. |
| Milk Thermometer | Helps you hit the perfect milk temperature (60-65°C). | A clip-on thermometer is a must-have accessory. |
| Wide Cups | Offers a larger canvas and makes it easier to get the spout close to the surface. | Browse our selection of professional-quality cups. |
Finally, don't forget the cups! A wide, bowl-shaped cup gives you a bigger canvas to work on. With this kit sorted, you're ready to start pouring.
Getting Your Canvas Ready: Espresso and Milk
Incredible latte art is built on two things: a rich, crema-topped espresso and flawlessly steamed, silky milk. You have to master these two elements first.
Think of them as your canvas and your paint. If either one is off, your final creation will suffer, no matter how skilled your pouring technique becomes. Nailing these is 90% of the battle.
Pulling the Perfect Espresso Shot
Your espresso is the base layer, and its quality is everything. For latte art, you need a shot with a thick, stable crema—that reddish-brown foam on top. This crema is what holds the white milk foam, creating the sharp contrast that makes your designs pop.
To get that perfect shot, you need to "dial in" your grinder. This just means tweaking the grind size until you get the perfect extraction. A great starting point is 18g of finely ground coffee in, to get 36g of liquid espresso out in about 25–30 seconds.
A reliable machine makes this process easier. A solid home espresso machine like the Rancilio Silvia V6 E gives you the control and stable temperature needed to pull consistent shots.
Before you pour the milk, give your freshly pulled espresso a gentle swirl in the cup. This evens out the crema, creating a smooth, uniform canvas ready for your art.
Once your espresso is ready, it's time to work on the "paint": the microfoam.
The Art and Science of Silky Microfoam
Steaming milk for latte art isn't just about heating it up. It’s a two-stage process of carefully adding air and then blending it into a perfectly smooth texture. You're aiming for microfoam—milk with the consistency of wet paint.
The two key phases are:
- Stretching (Aerating): This is where you introduce air. Keep the steam wand tip just below the surface and listen for a gentle hissing sound. This creates the volume.
- Texturing (Emulsifying): Dip the wand deeper into the milk. This creates a whirlpool that breaks down larger bubbles into a fine, silky microfoam and heats the milk evenly.
This skill is a hallmark of the professional barista, with the boom in UK speciality coffee elevating the craft. Barista training played a huge role in refining these techniques, as detailed by industry experts at Intelligence.Coffee.
Your Step-by-Step Guide to Steaming Milk
Ready to have a go? Start with fresh, cold whole milk in a cold jug. This gives you more time to work the milk before it gets too hot. Fill the jug to just below where the spout begins.
Positioning Your Steam Wand
First, purge your steam wand for a second to clear out any water. Submerge the tip just below the surface of the milk, placing it slightly off-centre. Angle the jug to help create a vortex.
Stretching the Milk
Turn the steam wand on to full power. Keep the tip near the surface to pull in air—you're listening for that gentle hiss. You’re aiming to "stretch" the milk, increasing its volume by about 20-30%. This phase should only last until the jug feels lukewarm (around 37°C).
Texturing the Milk
Raise the jug slightly so the steam wand is submerged deeper. The hissing sound will stop, and your focus shifts to maintaining the whirlpool. This vortex will fold the air into the milk, creating glossy microfoam.
Keep that vortex spinning until the jug is almost too hot to hold, around 60-65°C. A thermometer is your best friend when starting out. When you hit your target temperature, turn the steam wand off before removing it from the jug.
Tap the jug firmly on the counter to pop any remaining bubbles, then give the milk a vigorous swirl to polish it into a uniform, glossy sheen. Now you're ready to pour.
Pouring the Three Foundational Designs
Alright, your canvas is prepped and you have a jug of silky microfoam. It all starts with mastering the three patterns every barista learns first: the Heart, the Rosetta, and the Tulip.
Each design teaches you a core skill that builds on the last—control, motion, and placement. Don't chase perfection straight away; the goal is to get a feel for how the milk and espresso interact.

As you can see, the pour itself is the final act. Everything before it—the espresso shot and the milk texture—sets the stage for success.
Pouring the Heart: The Foundation of Control
The heart is where everyone starts. It's the simplest design, but it teaches you the most important lesson: controlling the height and speed of your pour to make the foam float.
- Tilt your cup at roughly a 45-degree angle. Start pouring from a height of about 10-15cm, aiming for the centre of the espresso to "set the canvas."
- Once the cup is about halfway full, bring the spout of your jug right down close to the surface. As you do this, level the cup out and pour a little faster. A white circle will appear.
- Keep pouring steadily into that exact spot, letting the circle grow.
- When the cup is nearly full, lift the jug slightly and pour a thin, straight line of milk right through the middle of the circle. This "pull-through" creates the heart shape.
The key takeaway is the relationship between height and design. Pouring from high up mixes the milk in; pouring low makes the white foam sit on top.
Pouring the Rosetta: The Art of Motion
Next up is the rosetta. This leaf-like pattern is all about introducing motion with a gentle side-to-side wiggle of your wrist as you pull the jug backwards.
- Just like the heart, start by tilting your cup and pouring from a height to set your canvas, filling it about halfway.
- Lower the spout of your jug close to the surface at the far side of the cup.
- Start a gentle, rhythmic side-to-side wiggle with your wrist, keeping the pour steady.
- As you create these stacked lines, slowly move the jug backwards towards yourself across the cup.
- When you reach the near edge, lift the jug slightly, slow the pour to a thin stream, and pull through the centre of the design to create the stem.
Pouring the Tulip: The Skill of Stacking
The tulip teaches precision and placement. It’s made by pouring a series of separate blobs and gently pushing them into one another to form a layered stack.
- Begin by setting your canvas as before. Tilt the cup and pour from high until it's about two-thirds full, then bring the spout down close to the surface.
- Pour one steady blob of foam into the centre of the cup, then stop pouring completely.
- Start pouring again just behind that first blob, creating a second one that gently pushes the first one forward. Repeat this for more layers.
- For the final touch, perform the same lift-and-pull-through you used for the others, dragging a thin line through your stack to create the stem.
To get the clean separation needed for the tulip, your milk must be perfect. A quality straight-sided milk foaming jug gives you the control you need for these precise pushes.
Quick Tips for All Designs
- Always Swirl: Before every pour, give your steamed milk a vigorous swirl in the jug. This keeps it integrated and ensures a glossy finish.
- Commit to Your Pour: Hesitation is the enemy of good latte art. Pour with a confident, steady hand.
- Practise with Water: To save milk and coffee, practise the pouring motions with a jug of water to build muscle memory.
Troubleshooting Common Latte Art Pours
Even seasoned baristas have off days, so don't get discouraged when a pour doesn't go to plan. Learning how to create latte art is as much about fixing mistakes as it is about celebrating perfect pours.
The key is figuring out why something went wrong. Think of each failed attempt as feedback telling you what to tweak for your next cup.
Fixing Your Milk Texture
Nine times out of ten, a bad pour starts with bad milk. If your texture is off, even the most graceful pouring motion won't save the design.
The Problem: Bubbly, Stiff Foam
Your jug looks more like a bubble bath than microfoam. The texture is stiff and clumpy, and when you pour, you get undefined blobs instead of sharp lines.
- Likely Cause: Over-aeration. You’ve let too much air in during the initial "stretching" phase.
- How to Fix It: Shorten your aeration time. You only need to hear that gentle 'tss-tss-tss' hissing sound for a few seconds. Then, submerge the wand fully and focus on creating that silent whirlpool.
The Problem: Thin, Watery Milk
Your milk looks lifeless, and when you pour, it just disappears into the espresso. Any pattern you attempt sinks without a trace.
- Likely Cause: Under-aeration. You haven't introduced enough air, so there's no foam to float on the crema.
- How to Fix It: Make sure the wand's tip is just kissing the surface of the milk when you begin. You need to hear that distinct, paper-tearing sound for a few seconds before you sink the wand deeper.
Getting your milk temperature right is critical for texture. Using a Motta Dual Dial Frothing Thermometer takes the guesswork out, helping you hit that perfect 60-65°C sweet spot every time.
Improving Your Pour and Canvas
So, your milk texture is spot on, but the art still isn't working? The problem probably lies with your espresso canvas or your pouring technique.
The Problem: Blurry or Washed-Out Designs
You pour a heart, but the edges are fuzzy and there’s little contrast. It’s more of a vague cloud than a crisp design.
- Likely Cause: Pouring from too high up. This drives the milk under the crema, washing it out instead of letting it float on top.
- How to Fix It: After setting your base, bring the spout of your milk jug right down close to the surface of the espresso—almost touching it. A slower pour at this stage allows the microfoam to sit on top.
The Problem: Crema That Breaks Apart
As you begin to pour, the crema on your espresso dissolves or splits, ruining your canvas.
- Likely Cause: A poor-quality canvas from stale coffee or a badly pulled shot. An under-extracted shot (one that runs too fast) will have a thin, weak crema.
- How to Fix It: Always start with fresh coffee beans and make sure your espresso is properly dialled in (aiming for 25-30 seconds). A quick swirl of the espresso in the cup before you pour also helps.
Quick Fixes for Common Latte Art Issues
Most issues have simple solutions. Here’s a quick troubleshooting table to help you identify the problem and get back on track.
| Problem | Likely Cause | How to Fix It |
|---|---|---|
| Big, Soapy Bubbles | Over-aerating the milk. | Shorten your stretching time to just a few seconds before creating the vortex. |
| Art Sinks Immediately | Under-aerated milk or a thin crema. | Ensure you hear the hissing sound at the start. Check your espresso shot quality. |
| Muddy, Faded Patterns | Pouring from too high when starting the design. | Bring the jug spout extremely close to the surface before beginning your pattern. |
| Clumpy "Blob" Shapes | Milk is too thick and stiff. | After steaming, give the jug a firm swirl to make the texture glossy and uniform. |
| The "White-Out" | Pouring too fast, flooding the cup with foam. | Slow down your pour rate. Pour gently to allow the art to develop. |
| Asymmetrical Shapes | An unsteady hand or pouring off-centre. | Relax your wrist and arm. Always aim for the exact centre of the cup. |
With practice, diagnosing these issues will become second nature, and you'll find yourself making tiny adjustments without even thinking about it.
Taking Your Art Further: Pouring with Plant-Based Milks
Once you've got the core patterns feeling second nature, it's time to tackle the world of plant-based milks. This is where good baristas become great ones.
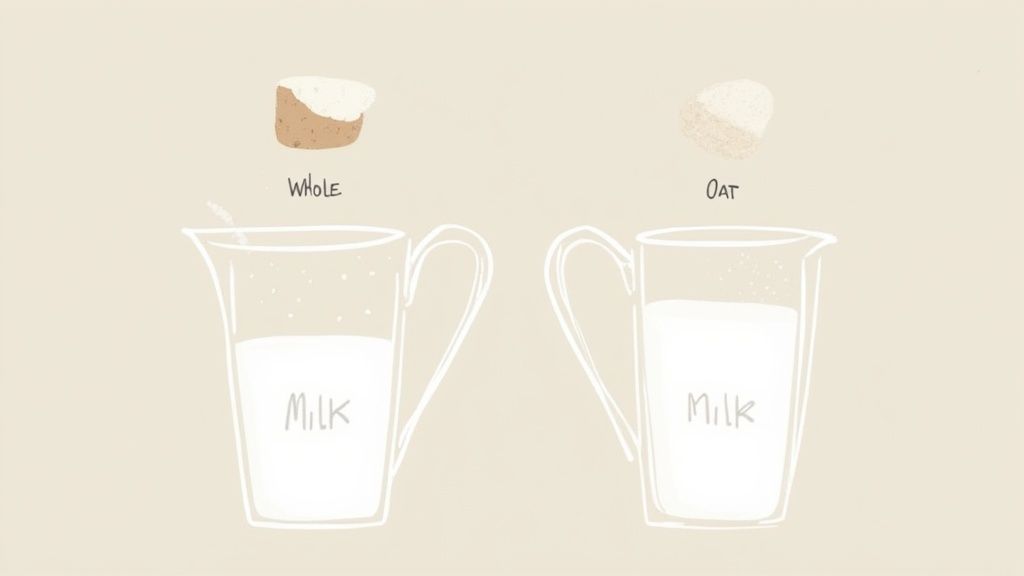
Mastering alternatives is now an essential skill. The demand for dairy-free coffee in the UK is booming, with consumption projected to grow significantly by 2028. This shift forces baristas to get comfortable with a new set of rules, as highlighted by the experts over at York Emporium.
Navigating Plant-Based Milks
Pouring with milk alternatives can be tricky. Their protein and fat structures are different from dairy, making them less forgiving when steaming.
- Almond Milk: Often thin and can curdle if your espresso is acidic. You need to stretch it very little.
- Soy Milk: Can produce a surprisingly stable foam but is also known for curdling. Steaming it a touch cooler, around 55°C, often helps.
- Oat Milk: The champion of the dairy-free world. ‘Barista-style’ versions have a higher fat content, helping them steam into a silky microfoam that’s incredibly close to whole milk.
Tips for Steaming Oat Milk
To get that perfect glossy finish with oat milk, you’ll need to tweak your technique. It generally needs a bit more aeration at the beginning than dairy does to build enough body.
Listen for that paper-tearing hiss and let it stretch for a second or two longer than you would with cow's milk. Once that's done, get a strong vortex going to integrate the foam. Be careful not to overheat it, as this can create a strange flavour and grainy texture.
A great trick for any plant-based milk is to swirl the espresso in the cup right before you pour. This cools it down just enough to reduce the chances of the milk splitting when it hits the coffee.
Got Questions About Latte Art?
To wrap things up, let’s tackle some common questions that pop up when you’re getting started. This will clear up any lingering doubts and get you pouring with confidence.
How Long Does It Take to Learn?
This varies hugely from person to person. Some might pour a recognisable heart within a few weeks of consistent practice, while others could take a few months to nail the silky milk texture.
The key is not to get discouraged. Focus on perfecting your milk first. Once the milk is right, the art will follow.
Why Is My Latte Art Sinking?
If your pattern vanishes almost immediately, the culprit is usually thin, under-aerated milk. This happens when you don't introduce enough air at the start of the steaming process.
You need to listen for that distinct hissing sound for the first few seconds. That's the sound of air being pulled into the milk. No hiss, no foam.
A classic beginner mistake is rushing the pour. Silky, glossy microfoam is the non-negotiable foundation. Without it, even the most perfect pouring motion won't save your design.
What Is the Easiest Design to Start With?
Without a doubt, the heart. It’s the perfect starting point because it teaches you the single most important skill: controlling your pouring height to make the foam float on top of the crema.
Once you master that simple "blob and pull-through" technique, you'll have the foundational skill needed for every other design.
For all your equipment needs, from professional espresso machines to the perfect milk jugs, explore the complete range and get expert advice at ADS Coffee Supplies.