
Meta Description: Want to make café-quality coffee at home? Our practical guide shows you how to make a perfect cappuccino, from pulling the espresso to frothing silky milk.
Ready to learn how to make cappuccino at home that rivals your favourite coffee shop? The secret isn't some mystical barista trick. It's simply about combining two things well: a shot of rich, punchy espresso and a layer of perfectly steamed, velvety milk. It's a skill any coffee lover can learn, and it's incredibly rewarding.
This guide gives you practical, actionable advice to turn your kitchen into a home café. With a bit of practice, you’ll be pulling shots and steaming milk to create a drink that’s balanced, beautifully textured, and saves you money in the long run.
Why Quality Matters
To get that authentic café taste and feel, a few things are non-negotiable. The quality of your coffee beans, the accuracy of your espresso shot, and the texture of your steamed milk are the three pillars of a great cappuccino. It might sound technical, but when broken down, it's all perfectly manageable.
- Freshly Ground Coffee: This makes a world of difference. Using whole beans and grinding them just before you brew unlocks so much more flavour and aroma.
- Proper Espresso Extraction: A well-pulled espresso shot is your foundation. It needs to be rich and syrupy with a thick, stable crema on top.
- Silky Microfoam: This isn't the bubbly froth from an electric whisk. We're talking about velvety, paint-like microfoam that mixes beautifully with the espresso.
Getting these right is the key to learning how to make cappuccino at home. If you're just starting and don't have all the gear, don't worry. You can learn a lot about making barista-quality coffee at home without expensive equipment, which is a brilliant first step.
A great cappuccino is a balanced harmony of espresso and milk. The goal is not just to combine them, but to create a texture and flavour where both elements shine through equally.
This guide will walk you through every step, from choosing the right gear at ADS Coffee Supplies to pouring your first bit of latte art. We’re here to demystify the process and help you become your own favourite barista.
How to Set Up Your Home Barista Station
Before you can pull that perfect shot, let's get your toolkit sorted. Making a café-quality cappuccino starts with having the right gear. Carving out a dedicated space in your kitchen will help organise your workflow and makes learning how to make cappuccino at home much more fun.
The centrepiece of any setup is the espresso machine. This is the one bit of kit where your investment makes the biggest difference. The options can feel overwhelming, but they mostly fall into a few key categories.
Choosing Your Espresso Machine
For absolute beginners, a pod machine is a straightforward entry point. They're simple to use and give consistent results with zero fuss. For true cappuccino craft, however, you’ll want more control.
That’s where semi-automatic espresso machines come in. They put you in the driver's seat, letting you handle everything from grinding to timing the shot, which is essential for honing your skills.
- ADS Coffee Supplies: The best place to begin is with their excellent selection, where you know you're getting quality and reliability.
- Other Retailers: To kit out your station without breaking the bank, you can also check out guides to the best affordable espresso machines.
Pro Tip: Look for a machine with a proper steam wand, not just a panarello frother (the plastic sheath). A real steam wand gives you the fine control needed to create silky microfoam—the hallmark of a great cappuccino.
The Unsung Hero: A Quality Grinder
If the espresso machine is the heart of your setup, the grinder is its soul. Pre-ground coffee goes stale quickly, losing its flavour and aroma. A quality burr grinder isn't just a nice-to-have; it's essential for anyone serious about their coffee.
Unlike blade grinders that smash beans into inconsistent bits, burr grinders crush them for a uniform grind. This consistency is everything for a balanced espresso shot. Learn more in our guide on how to grind your coffee beans.
Essential Barista Accessories
A few smaller tools will make your life easier and your coffee better. These are relatively cheap but pay for themselves in consistency.
- Milk Frothing Pitcher: A stainless steel pitcher is a must for steaming milk. The metal lets you feel the temperature, and the spout is crucial for controlled pouring.
- Digital Scales: Precision is your friend. Weighing your ground coffee means you can repeat your successes every single time.
- Tamper: Upgrade from the flimsy plastic tamper that comes with most machines to a heavy, well-fitting metal one. It makes a world of difference for even pressure.
- Knock Box: A simple tool for getting rid of used coffee grounds without making a mess.
What are some budget-friendly alternatives?
Don't feel you need to spend a fortune to get started. A Moka pot or an AeroPress can brew a strong, concentrated coffee that works well as a base. For the milk, a handheld electric frother can do a surprisingly good job. You can also use a French press: warm your milk, pour it in, and plunge the filter up and down rapidly to create foam.
Pulling the Perfect Espresso Shot
An outstanding cappuccino is built on one thing – an exceptional espresso shot. This isn't just a preliminary step; it’s the very foundation of your drink's flavour. Getting this part right is the core skill you'll need to master.
The journey starts with your coffee beans. Most baristas lean towards a medium to medium-dark roast for cappuccinos. These roasts bring a rich, balanced profile with notes of chocolate and caramel that work beautifully with milk. To learn more, it's worth understanding various coffee drinks, including espresso.
Dialling in Your Grind
The next critical hurdle is the grind size. For espresso, you’re aiming for a fine, consistent grind that feels like table salt. Get this wrong, and your coffee will suffer.
If the grind is too coarse, water will gush through, leaving you with a sour, weak, under-extracted shot. Go too fine, and the water will struggle to push through, resulting in a bitter, burnt, over-extracted shot. The goal is to find that sweet spot in between. This process, known as "dialling in," takes patience and small adjustments.
Dosing and Tamping Your Coffee
When it comes to dosing, precision is key. Using the same amount of coffee for every shot ensures consistency. For a standard double shot, aim for 16–19 grams. Use digital scales to weigh your portafilter before and after grinding to nail the dose every time.
After dosing, distribute the grounds evenly in the basket. Now, it's time to tamp. The aim is simple: apply firm, even pressure to create a flat, level bed of coffee. This is vital because it forces the water to flow through the entire coffee puck uniformly.
A consistent, level tamp is more important than a forceful one. Aim for around 15 kg of pressure, but focus on keeping your wrist straight and the tamp perfectly level.
The Art of the Extraction
With your portafilter locked in, it’s time for the magic. A well-pulled double espresso should take between 25–30 seconds from the moment you hit the button. This timing is your most important clue.
As it extracts, watch the visual cues. The first few seconds should produce dark, rich droplets that merge into a steady, syrupy stream. The colour should be a deep reddish-brown before it gradually lightens. For more detail, you can explore the science behind perfect espresso extraction.
Your final shot should yield roughly 30–40 ml. The most obvious sign of a good shot is the crema – the beautiful, reddish-brown foam on top. A healthy crema should be thick, stable, and last for a couple of minutes.
Creating Velvety Microfoam for Your Cappuccino
You’ve pulled a beautiful shot of espresso. Now for the second act, which is just as important if you want to learn how to make cappuccino at home: steaming the milk. We’re aiming to create a velvety, glossy microfoam. It’s this luxurious texture that gives a proper cappuccino its signature creamy mouthfeel.
The magic happens in a two-stage process with a steam wand. First, you introduce air into the milk ("stretching"). Then, you create a whirlpool to break down any larger bubbles and fold everything together ("texturing"). This combination turns cold milk into a silky liquid that pours like wet paint.

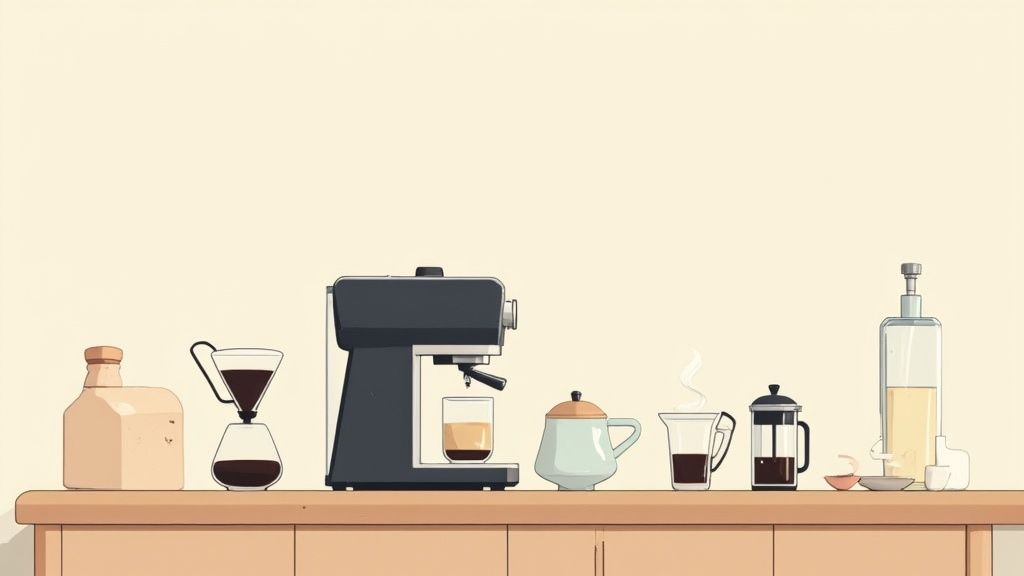
This image shows the essential workflow—dose, tamp, and brew—that lies at the heart of any great espresso drink.
The Science of Perfect Milk Foam
A traditional cappuccino is a single shot of espresso topped with textured milk and a foam layer about 1 to 2 centimetres deep. It's typically served in a 150-180 ml cup. The quality of that foam is everything.
Microfoam is born when steam heats the proteins in milk, causing them to unravel and wrap around tiny air bubbles. At the same time, the fats in the milk melt, contributing to a rich, creamy texture.
The sweet spot for steamed milk is between 60-65°C. Go hotter, and the proteins break down, making the milk lose its sweetness. A stick-on thermometer for your milk pitcher is a brilliant bit of kit to have when you're starting out.
Using a Steam Wand Step by Step
Ready to get steaming? Here’s a straightforward guide to nailing that perfect texture.
- Start Cold: Always use fresh, cold milk straight from the fridge in a cold stainless steel pitcher. Only fill it to the bottom of the spout to leave room for expansion.
- Purge the Wand: Before you start, blast the steam for a couple of seconds. This clears out any condensed water.
- Get in Position: Submerge the steam wand’s tip just below the surface of the milk, slightly off-centre.
- Introduce Air (Stretching): Turn the steam on full blast. You should hear a gentle "tsss-tsss" hissing sound. Hold the tip near the surface for the first 5-8 seconds, until the pitcher feels lukewarm.
- Create the Whirlpool (Texturing): Raise the pitcher slightly to sink the wand deeper. Get a strong vortex going to fold the air into the milk and create silky microfoam. Keep this going until the pitcher gets too hot to hold.
- Finish and Clean: Turn the steam off before removing the wand. Wipe the wand with a damp cloth and purge it again. Tap the pitcher on the counter to pop any large bubbles, then swirl it to keep the foam mixed.
Key Takeaway: Your ears are your best guide. A gentle hiss means you're stretching correctly. A loud screeching noise means the wand is too deep, while big spluttering bubbles mean it’s too high.
What If You Don't Have a Steam Wand?
No espresso machine? No worries. While you won’t get true microfoam without a steam wand, you can still whip up a pleasant, frothy texture with simple tools.
A Comparison of Home Milk Frothing Methods
Here’s a quick rundown of the most common methods when a steam wand isn't an option.
| Method | Equipment Needed | Pros | Cons | Resulting Foam Texture |
|---|---|---|---|---|
| Handheld Frother | Battery-operated whisk | Fast, affordable, easy to clean | Can create large bubbles, less control | Light and airy |
| French Press | Standard French press | Creates dense foam; no electricity needed | Requires manual effort, can be messy | Thick and creamy |
| Shaking in a Jar | Jar with a secure lid | Incredibly simple, no special equipment | Inconsistent results | Bubbly and frothy |
While these methods are great alternatives, none perfectly replicate the silky microfoam from a steam wand. For a deeper dive, check out our ultimate guide to milk frothers and their uses.
Constructing Your Cappuccino with a Touch of Art
You’ve got a perfect shot of espresso and a jug of silky microfoam. This is the final, most satisfying stage. Learning how to bring them together is a huge part of mastering how to make cappuccino at home, giving you a beautifully balanced, professional-looking finish.

The goal here is integration. We want every sip to deliver a balanced flavour of rich coffee and sweet, creamy milk. A traditional cappuccino is a drink of thirds: one part espresso, one part steamed milk, and one part foam.
Mastering the Perfect Pour
First, give your freshly pulled espresso a gentle swirl in the cup. This evens out the crema, creating a uniform canvas for your milk.
Now for the milk. Give the jug a firm tap on the counter to pop any big bubbles. Follow that with a confident swirl to mix the microfoam back into the milk. Don't skip this, as separated foam will result in a clumpy, uneven pour.
Hold your cup at a 45-degree angle. Start pouring from about 10-15 cm up, aiming for the centre of the espresso. This initial "dive" allows the milk to punch through the crema and mix with the coffee underneath.
Once the cup is about half full, bring the spout of your jug right down close to the surface. At the same time, start to straighten the cup. This change in height and angle lets the white microfoam float to the top.
An Introduction to Basic Latte Art
You don't need to be a world champion barista to add flair to your homemade cappuccino. The heart is the perfect shape to begin with.
Here’s a quick rundown on creating a simple heart:
- Start Your Pour: Follow the technique above, holding the cup at an angle and pouring from a height to get the milk and espresso mixing.
- Lower and Centre: As the cup fills and you straighten it, bring the jug spout to the surface. A white dot of foam should appear.
- Create the Blob: Keep pouring steadily into that central dot. You’ll see it expand into a larger circle.
- The Final Cut: To finish, lift the jug slightly and pour a thin, straight line of milk through the middle of your white circle. This pulls the blob into a heart shape.
It takes practice, but the process is rewarding. For more tips, see our guide to making perfect latte art. Don't worry if your first few attempts look more like clouds than hearts; consistency comes with repetition.
Solving Common Cappuccino Problems at Home
Even the best baristas pull a bad shot now and then, so don't be disheartened if your first few attempts aren't perfect. Think of every mistake as a lesson. This guide walks you through the most common pitfalls to help you get back on track.
The UK has become a nation of coffee lovers with high standards, as shown by the UK's thriving coffee scene. This section is about closing the gap between the coffee shop and your kitchen counter.
Fixing Your Espresso Shot
Is your espresso not tasting right? A shot that pulls in under 20 seconds and tastes sour is under-extracted. A shot that takes over 30 seconds and tastes bitter is over-extracted.
- If it's Sour (Too Fast): Your grind is too coarse. Tweak your grinder to a finer setting to slow things down.
- If it's Bitter (Too Slow): Your grind is too fine. Go a bit coarser on the grinder to let the water flow more freely.
An uneven tamp creates channels where water can rush through, leading to a shot that's both sour and bitter. Aim for consistent, level pressure every single time.
Improving Your Milk Foam
Nailing velvety microfoam is an art you can master. If you're ending up with bubbly, thin milk, it’s probably down to one of these common mistakes.
-
Problem: The foam has big, soapy bubbles.
This means you've let in too much air.- Solution: Only introduce air for the first few seconds. Then, dip the wand deeper to create a smooth whirlpool to break down any big bubbles.
-
Problem: The milk is thin and watery.
You didn't introduce enough air or you've overheated the milk.- Solution: Keep the steam wand's tip just below the surface until the milk has expanded by about 30%. Stop steaming when the milk hits 60-65°C.
-
Problem: The milk won't foam at all.
The milk isn't fresh, or you're trying to re-steam it.- Solution: Always start with fresh, cold milk. Once milk has been heated, its proteins are denatured and can't create foam a second time.
Your Cappuccino Questions Answered
Even with a solid guide, questions pop up when you're learning how to make a cappuccino at home. Let's tackle some common queries.
What Is the Best Type of Milk for a Cappuccino?
For classic, rich microfoam, whole milk is the gold standard. The higher fat content creates a stable, glossy foam. Semi-skimmed milk is a decent alternative for a lighter texture.
For a dairy-free cappuccino, oat milk is the clear winner. It froths beautifully and has a creamy profile that complements coffee well. Barista-specific versions of almond or soya milk also give fantastic results.
Can I Make a Cappuccino Without an Espresso Machine?
Absolutely. A Moka pot or an AeroPress will brew a strong, concentrated coffee that serves as an excellent stand-in for an espresso shot.
For the milk, a handheld frother or a French press can create a respectable foam. The texture won't be identical to silky microfoam, but you'll still get a wonderfully satisfying homemade cappuccino.
How Often Should I Clean My Coffee Equipment?
Consistent cleaning is non-negotiable. Your steam wand needs to be purged and wiped with a damp cloth immediately after every use. This stops milk from hardening and building up.
Your machine's group head should get a quick backflush with water daily, and the portafilter should be rinsed after each shot. Regular descaling and a thorough clean of your grinder are vital to protect the flavour of your coffee.
Ready to take your home coffee game to the next level? From premium beans to professional-grade machines, ADS Coffee Supplies has everything you need to become your own barista.
Explore our full range of coffee supplies and start your journey today at https://ads-coffee-supplies.co.uk.


