To get started with latte art, you need to nail two things: pulling a rich espresso shot with a solid crema and steaming milk until it’s silky, glossy microfoam. Get those two right, throw in a steady hand for the pour, and you’ve got the foundations for your first hearts and rosettas. Don’t expect perfection on day one—this is all about practice and patience.
Your Journey into Home Barista Artistry
Ever watched a barista pour a flawless design into your cup and thought, “I wish I could do that”? Well, you can. This guide isn’t about chasing competition-level perfection overnight. It’s about finding the simple joy in creating something beautiful in your own kitchen.
Learning how to make coffee latte art is a skill any enthusiast can pick up. I still remember my first successful heart—it was wonky and completely off-centre, but the feeling of accomplishment was brilliant. That’s the moment your daily coffee stops being a routine and becomes a creative outlet.
More Than Just a Pretty Pattern
Latte art is the final flourish, the visual proof that the drink underneath has been made with care. It tells you everything you need to know before you even take a sip.
- A Sign of Quality Espresso: A well-defined pattern can only hold its shape on a rich, stable crema. That tells you the espresso shot was extracted properly.
- Proof of Perfect Milk: You can’t get those glossy, sharp lines without perfectly textured microfoam—milk that’s silky and smooth, not bubbly or thin.
- An Elevated Experience: It just makes your morning ritual feel a bit more special, turning a simple cup of coffee into a small, satisfying work of art.
This guide is your starting point. We’ll demystify the process, breaking down the essential gear, the science of milk steaming, and the pouring techniques you need to create your first designs. It’s all about building skills one step at a time.
Ultimately, mastering the basics is a journey. For those who want to deepen their skills with some hands-on guidance, exploring professional barista training courses can provide expert feedback and seriously speed up your progress. We’ll walk you through everything you need to know, from pulling that first shot to pouring a design you can be proud of.
Getting Your Essential Tools and Ingredients Sorted
Before you even think about pouring that first rosetta, you need to get your station set up correctly. It’s not about having the flashiest kit, but about understanding why each bit of gear is so important for nailing your latte art.
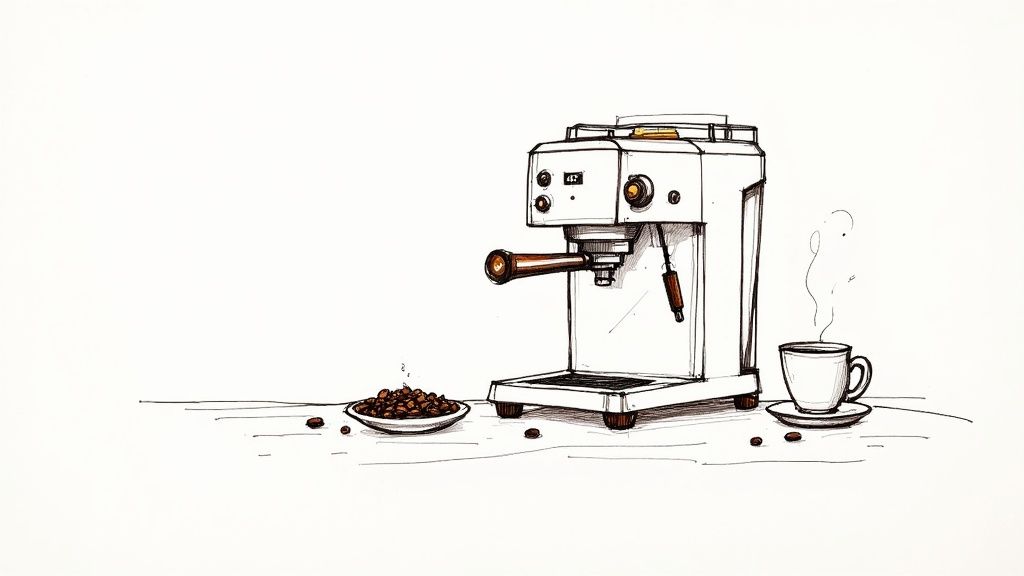
Your espresso machine is the heart of the whole operation. While plenty of machines can pull a shot, one with a non-pressurised portafilter basket is a game-changer. It gives you so much more control over the extraction, letting you tweak your grind and tamp to produce that rich, stable crema that’ll become your canvas.
Right alongside the machine, a quality coffee grinder is non-negotiable. Pre-ground coffee just won’t cut it; it won’t give you the fresh, robust crema needed to hold a pattern. You need that fine, consistent grind to pull a balanced shot. If you’re looking for guidance, we have a whole guide on how to choose the right coffee grinder to match your setup.
The Unsung Heroes: Your Jug and Ingredients
Don’t underestimate the milk jug. It’s more than just a pot to hold your milk; it’s a vital tool for creating that silky, paint-like microfoam. The shape and, crucially, the spout are designed to help you control the milk’s flow, which is everything when it comes to the pour.
Now, let’s talk ingredients. The coffee beans you choose have a massive impact on your crema. Always go for freshly roasted beans. They still have all the oils and gases needed to create a thick, lasting crema—a stable base that makes your patterns really stand out.
As for the milk, you’ve got a few options:
- Whole Dairy Milk: This is your best friend when you’re starting out. The high-fat content makes it incredibly forgiving to steam, creating a rich, glossy microfoam almost every time.
- Semi-Skimmed Milk: A great option too, though it can be a little less forgiving than whole milk if you overheat it.
- Barista-Edition Plant Milks: Oat milk is a fantastic dairy-free alternative that steams beautifully. Soya and almond can also work, but make sure you grab the ‘barista’ version, as they’re specially formulated to create a stable foam.
Remember, consistency is key here. Using the right tools and fresh, high-quality ingredients eliminates a lot of the guesswork. It means you can focus all your energy on perfecting your pouring technique, which is built on this solid foundation.
It’s no surprise the latte is the UK’s favourite coffee, and a bit of art makes it even better. A 2022 survey found that 35% of UK coffee drinkers prefer a latte, which is a big slice of the nation’s 98 million daily cup habit. You can find more interesting stats on UK coffee consumption trends on balancecoffee.co.uk.
Pulling the Perfect Espresso Shot: Your Canvas
Before you even think about pouring intricate patterns, you need a flawless canvas. In the world of latte art, that canvas is your espresso shot. A great shot isn’t just about flavour; it’s about creating a rich, stable, and beautifully coloured base that can hold your silky milk.
The first step is “dialling in” your coffee. This is the art of finding the perfect grind size for your specific beans and machine. It’s a delicate balancing act—go too coarse, and the water will gush through, leaving you with a weak, sour shot. Grind too fine, and you’ll choke the machine, resulting in a slow, bitter extraction.
You’re aiming for a flow that looks like warm honey, often called a ‘mouse tail’ in barista circles.
Once your grind is sorted, focus on consistent dosing and tamping. Dosing is simply using the right amount of coffee for your basket, while tamping is the skill of pressing those grounds into a firm, level puck. An even tamp is non-negotiable; it stops water from carving easy channels through the coffee, ensuring a balanced, delicious extraction.
Getting the Extraction Just Right
The real prize for latte art is the crema—that gorgeous, hazelnut-coloured foam that sits on top of your espresso. You need a crema that’s thick, elastic, and free of big bubbles. It acts as a barrier, letting the white microfoam float on top instead of instantly mixing in and disappearing.
Here’s a quick checklist for a visually perfect shot:
- Colour: A rich, reddish-brown with darker speckles, often called ‘tiger striping’.
- Flow Rate: The shot should begin to pour after about 8-10 seconds and extract smoothly for around 25-30 seconds.
- Crema Stability: It should be thick enough to hold its form for at least a minute.
A perfectly pulled espresso shot is the unsung hero of good latte art. It provides not only the flavour foundation but also the physical canvas. A weak, thin crema will cause your design to dissolve into a blurry mess, no matter how well you’ve steamed your milk.
Troubleshooting Common Espresso Issues
Getting it wrong is all part of the learning curve. If your shot isn’t looking right, don’t sweat it—it’s usually a simple fix.
A shot that gushes out in under 20 seconds is under-extracted and will taste unpleasantly sour. The fix? Just adjust your grinder to a finer setting.
On the flip side, if your shot just drips slowly and takes over 35 seconds, it’s over-extracted. This will taste bitter and burnt. It means your grind is too fine, so you’ll need to make it a bit coarser.
Finding that sweet spot on your machine is crucial. If you’re exploring your options, our guide to the best home espresso machines in the UK can help you understand what features make this process easier.
You have to nail the basics before you can create beautiful art. Learning how to brew high-quality coffee is a non-negotiable first step. It takes some practice, but once you can consistently pull great shots, you’ve already won half the battle.
Steaming Silky Milk for Flawless Latte Art
If the espresso shot is your canvas, then perfectly steamed milk is your paint. Getting this bit right is probably the most important part of learning how to make great latte art, and it all comes down to listening, looking, and feeling. Forget the complicated jargon; let’s focus on the practical cues that tell you you’re on the right track.
The whole process breaks down into two distinct phases. First up is stretching (or aerating), where you introduce a tiny amount of air into the milk to build volume. The second is texturing, where you sink the wand and create a whirlpool to break down any large bubbles, blending everything into a silky-smooth microfoam. Nailing this sequence is everything.
The Two Phases of Steaming
The trick is to listen closely. When you first fire up the steam wand, keeping the tip just below the surface, you should hear a gentle hissing sound. It’s often described as tearing paper. That’s the sound of air being introduced—the stretching phase. It should not be a loud, aggressive roar. That just means you’re creating big, soapy bubbles, which are the absolute enemy of good latte art.
After just a few seconds of this gentle hiss, you’ve introduced enough air. Now it’s time to submerge the steam wand a little deeper into the milk. This stops the hissing entirely and should create a quiet hum as the milk begins to spin into a vortex. This whirlpool motion is vital for creating that glossy, paint-like texture you’re after.
A well-designed milk pitcher can make a world of difference here. The specific shape of something like the popular Motta Tulip Milk Jug, for example, is crafted to help you generate that essential whirlpool more easily. It gives you a real advantage in creating consistently silky microfoam.
Temperature Is Your Guide
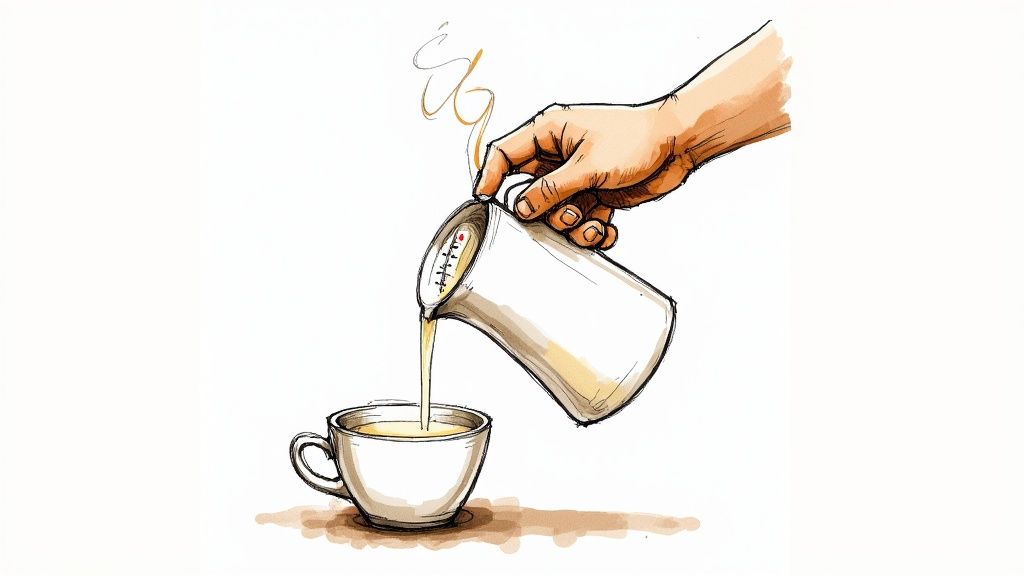
Temperature is another critical piece of the puzzle. As milk heats up, its natural sugars start to break down, giving it a lovely sweetness. But if you take it too far (generally above 70°C), those sugars will burn, and the proteins will denature. This kills both the sweetness and that silky texture you worked so hard for.
You’re aiming for a final temperature of around 55-65°C. To the touch, it should feel very warm, but not so hot that you have to snatch your hand away instantly. As soon as it hits that point, turn off the steam. Give the jug a firm tap on the counter to pop any rogue bubbles, followed by a good swirl to keep that microfoam glossy and integrated.
The goal is to create a texture that resembles wet gloss paint—smooth, shiny, and with no visible bubbles. This is the ‘microfoam’ that will sit beautifully on your crema and allow you to pour sharp, defined patterns.
This sketch shows the ideal pouring motion for a simple heart, demonstrating how the tilted cup and steady stream from the pitcher come together to form the design on the crema canvas.
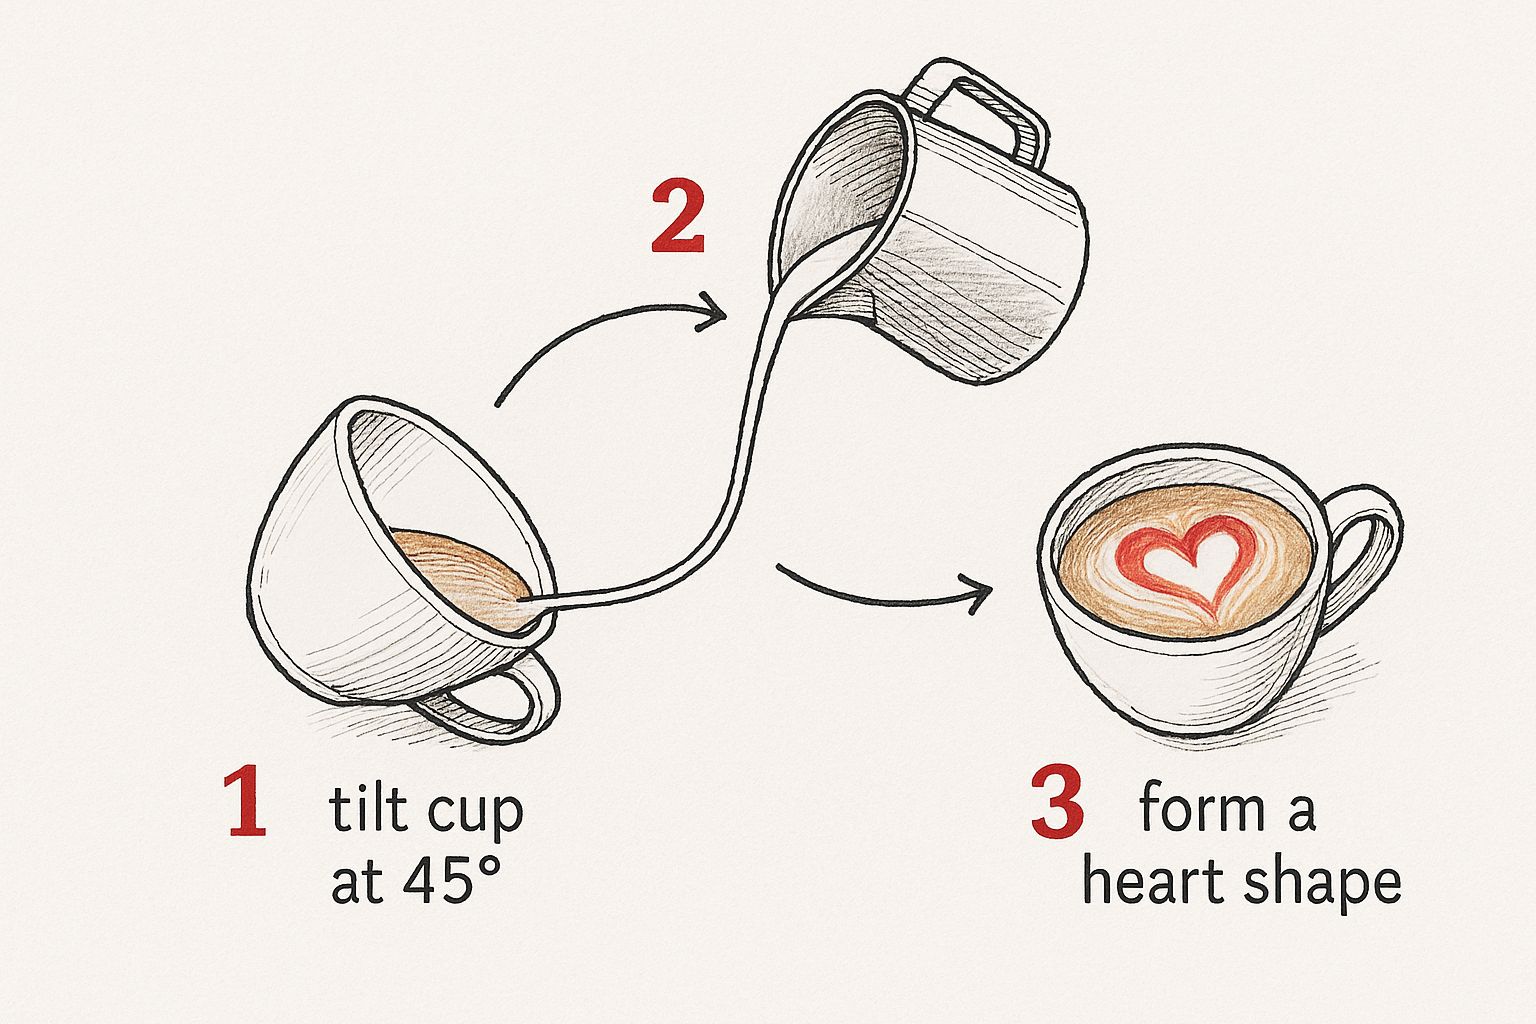
As you can see, control and consistency are far more important than speed. This allows the microfoam to settle gently onto the espresso, not crash into it.
A Guide to Steaming Different Milk Types
Not all milks steam equally. The fat and protein content in milk dramatically affects how well it will stretch and hold its texture. While whole dairy milk is by far the easiest for beginners, you can get fantastic results with plant-based alternatives—especially the ‘barista’ editions which have been formulated specifically for steaming.
Here’s a quick comparison of what to expect from different types.
| Milk Type | Steaming Difficulty | Texture Potential | Best Practice Tip |
|---|---|---|---|
| Whole Dairy Milk | Low | Excellent | The high fat content makes it very forgiving. It’s perfect for beginners learning the ropes. |
| Semi-Skimmed Milk | Low-Medium | Good | Steams well but can become thin if overheated. Keep a close eye on the temperature. |
| Skimmed Milk | High | Poor to Fair | Creates a stiff, dry foam very quickly. Requires a very short stretching phase to avoid a meringue-like texture. |
| Barista Oat Milk | Low | Excellent | Often considered the best dairy-free option. It creates a creamy, stable foam that pours beautifully. |
| Barista Soya Milk | Medium | Good | Can produce great texture but is prone to curdling if the espresso is too acidic or the milk gets too hot. |
| Barista Almond Milk | Medium-High | Fair to Good | Tends to be thinner and can separate easily. Needs a very gentle stretch and a good vortex to hold together. |
Ultimately, choosing the right milk and practising the two phases—stretching and texturing—will transform your latte art from a blob into a recognisable design.
The Pour: Turning Milk into Magic
Right, you’ve pulled a beautiful shot of espresso and steamed a jug of milk that’s got that perfect wet-paint gloss. Now for the fun bit – combining the two to create your first piece of latte art.
Let’s be honest, your first few pours will probably look more like abstract clouds than anything else. Don’t sweat it. We’ve all poured our fair share of what we kindly call ‘funky blobs’! This part is all about getting a feel for control and building confidence.
Pouring Your First Designs: From Blob to Heart
The first movement is absolutely critical; it’s what sets you up for success. You need to ‘set the canvas’.
To do this, you pour from a height of several inches above the cup, using a thin, steady stream of milk. This high pour is designed to let the milk dive underneath the crema, mixing with the espresso without messing up that lovely brown surface. Keep this going until the cup is about half to two-thirds full.
The High-to-Low Transition
With your canvas set, it’s time to get up close and personal. Lower the spout of your milk jug right down so it’s nearly touching the surface of the coffee. This is where the magic starts. As soon as you do this, you’ll see the white microfoam begin to float on top of the crema, creating your pattern.
This simple transition from high to low is the entire secret to defined latte art.
A high pour mixes the milk into the espresso. A low pour paints the milk on top of the crema. Get that right, and you’re halfway there.
Mastering the Foundational Heart
The heart is the cornerstone of latte art. It’s the perfect first goal because it teaches you the most important principles: flow control and deliberate movement.
Once your jug is low and close to the surface, a white dot will appear. The trick is to keep pouring steadily right into the centre of that dot. As you keep pouring, the dot will expand into a bigger and bigger circle. Let it grow until it’s roughly the size you want your final heart to be.
The final motion is what turns that circle into a heart.
Lift your jug up just a little, which will reduce the flow of milk to a thinner stream. In one smooth motion, pull this thin stream straight through the centre of your circle, from one side to the other. This “pull through” is what drags the foam and creates that classic heart shape.
It helps to visualise the sequence:
- Set the Canvas: Pour from high up to mix your base.
- Get Close: Drop the jug spout right down to the surface.
- Start the Blob: Pour into the middle, letting the white circle form and grow.
- The Pull Through: Lift slightly and draw a clean line right through the centre.
It sounds simple, but getting it smooth and consistent takes practice. This isn’t just about making your morning coffee look nice, either; it’s a recognised mark of quality right across the UK coffee scene. In fact, research shows that 53% of customers believe that well-presented coffee, often signalled by latte art, significantly improves their experience and makes them more likely to come back. You can read more on how visual appeal creates customer loyalty from these insights published on blog.illy.com.
So embrace the journey. Every single pour, whether it ends up as a perfect heart or another quirky blob, is a step forward. You’re not just making a drink; you’re learning a genuinely satisfying new skill, one cup at a time.
Common Latte Art Questions Answered
Even when you follow all the steps, learning how to make latte art can feel a bit mysterious at first. It’s completely normal to hit a few snags along the way. Let’s tackle some of the most frequent hurdles that new home baristas face.
Why Is My Milk Full of Big Bubbles Instead of Being Smooth?
This is a classic sign of introducing too much air, too quickly. It’s a common mistake, but thankfully, an easy one to fix.
You’re likely plunging the steam wand too deep or keeping it at the surface for too long, creating what’s called ‘macrofoam’ instead of the silky microfoam you need. The goal is a shorter, more controlled stretching phase right at the beginning—just a few seconds of that gentle ‘tss-tss’ sound is plenty.
After that initial stretch, you need to sink the wand deeper into the milk. This stops any more air from getting in and starts creating a whirlpool. That vortex is your best friend; it breaks down any larger bubbles and folds the air in, creating that glossy, paint-like texture you need for sharp, defined art.
My Latte Art Looks Washed Out and Blurry, What Am I Doing Wrong?
A blurry, indistinct pattern usually points to one of two culprits: a weak espresso crema or poorly textured milk.
First, take a hard look at your espresso shot. A thin, pale, or bubbly crema won’t provide a stable canvas for your design, causing the milk to sink and mix immediately. Try using fresher beans or adjusting your grinder for a finer setting to improve your crema’s quality.
Second, your milk might be too thin or separated. Right before you pour, give the jug a firm swirl on the countertop. This essential step, often called ‘polishing’, reintegrates the foam and liquid into one glossy, uniform mixture, ready for pouring.
Can I Make Good Latte Art with Non-Dairy Milk?
Absolutely, though your choice of milk alternative really matters here. The key is to look for a ‘barista edition’ of your preferred plant-based milk. These versions are specifically formulated with added proteins and fats to help them behave more like dairy milk when steamed.
Oat milk is widely considered the easiest to start with, as it creates a creamy, stable foam that pours beautifully. For more options, you can explore a wide variety of alternative milks suitable for coffee to find what works best for you. The steaming technique is the same, but be extra careful not to overheat non-dairy milks, as they can split much more easily.
The trend towards drink customisation in the UK is huge, especially among younger consumers. A recent study found that 75% of coffee drinkers aged 18-34 want to personalise their drinks, turning their daily coffee into a form of self-expression. Mastering latte art is a fantastic way to tap into this desire for a unique, handcrafted beverage. You can discover more insights about coffee customisation trends on perfectdailygrind.com.
Whether you’re a home barista perfecting your craft or a café owner outfitting your business, having the right supplies is essential. ADS Coffee Supplies offers everything from professional-grade equipment to premium beans and barista tools, all with fast, reliable UK delivery. Explore our full range at https://ads-coffee-supplies.co.uk.