
In a world full of complex coffee gadgets, the humble stove coffee percolator offers a welcome return to simplicity. These classic brewers are making a comeback in UK kitchens, loved for their straightforward design and their ability to produce a uniquely bold and aromatic cup of coffee. This guide gives you the practical, actionable advice you need to master this timeless brewing method.
The Enduring Appeal of Stove Coffee Percolators
Long before pod machines, the gentle bubbling of a percolator on the hob was the sound that started the day. This nostalgic charm is now capturing a new generation of coffee lovers who value both its simplicity and the incredibly rich flavour it delivers.
Unlike methods that use a single paper filter, a stove coffee percolator continuously cycles hot water through the coffee grounds. This process coaxes out a deep, robust character from the beans that you just don't get any other way.
This is for those who enjoy a stronger, more full-bodied brew that fills the house with an incredible, inviting aroma. The process is hands-on and deeply satisfying, connecting you more closely to the art of making a great cup of coffee.
What Makes Percolated Coffee Special?
The unique brewing cycle is what sets percolated coffee apart, creating a distinct taste profile that many coffee enthusiasts actively seek. Here's a quick look at what makes it so appealing:
- Robust Flavour: The continuous percolation extracts more oils and soluble compounds from the coffee, resulting in a noticeably stronger and richer flavour than many other methods.
- Simplicity and Durability: With no complex electronics or disposable parts, these brewers are incredibly reliable. They're built to last for years, making them a brilliant, sustainable choice for any kitchen.
- Versatility: A stove coffee percolator is perfect for home use on a gas or electric hob, but it's also a trusted companion for camping trips. You can make great coffee almost anywhere you have a heat source.
While some see a similarity to a Moka pot, the percolation method is entirely its own. If you're interested in exploring similar stovetop brewers, you might enjoy our Moka Pot Coffee Lover Christmas Hamper for a different, yet equally authentic, experience.
Understanding How Your Percolator Brews Coffee
To get the best from a stove coffee percolator, it helps to know what’s happening inside the pot. The process is a simple but brilliant continuous cycle, powered by nothing more than heat. This unique brewing mechanism is what gives percolated coffee its famously bold and robust character.
At its heart, the process runs on basic physics. As the water at the bottom of the pot heats up, pressure builds and forces it up a central hollow tube. It then showers down over the coffee grounds in the basket, slowly infusing the water with flavour before dripping back to the bottom to start the cycle again.
This diagram shows the simple, direct appeal of this brewing method.
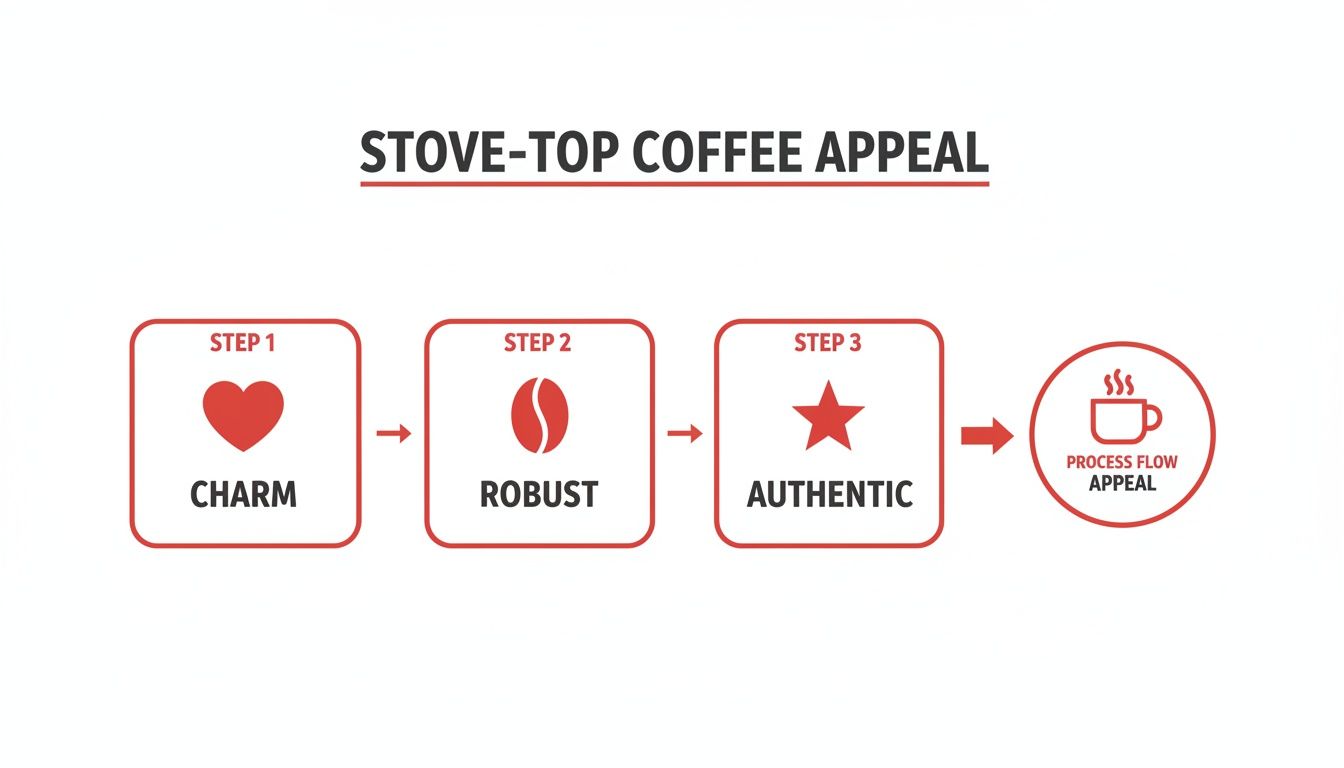
The journey from nostalgic charm to a truly robust and authentic brew is why this method has endured. Each time the water cycles through the grounds, the coffee gets stronger, which is why keeping an eye on the brewing time is critical for the final taste.
The Key Components of Your Percolator
Getting to know the individual parts makes the whole process much clearer. A stove coffee percolator isn't complicated; it's just a few essential components working together in harmony.
Here are the parts you'll find inside:
- The Pot (or Chamber): The main body that holds the water.
- The Pump Tube (or Stem): A hollow metal tube that stands vertically in the centre, acting as an elevator for the hot water.
- The Filter Basket: A perforated basket that holds your coarse coffee grounds and sits on top of the pump tube.
- The Spreader Lid: A small, perforated lid that sits over the filter basket to shower the hot water evenly across the coffee grounds for balanced extraction.
The Brewing Cycle Explained
Once assembled, you have a self-contained brewing system. When you place the percolator on your hob, water at the bottom heats up. Steam trapped at the base of the pump tube creates pressure, forcing bubbles of hot water up the tube.
The key takeaway is that the coffee is brewed multiple times. This repeated extraction produces the deep, rich flavour that fans of stove coffee percolators love, but it's also why you need to watch it carefully to prevent a bitter taste.
This cycle continues for as long as the percolator is on the heat. You can watch the progress through the glass knob on the lid, seeing the liquid gradually darken as the coffee strengthens. Understanding this puts you in control, allowing you to stop the process the moment your brew reaches its ideal strength.
Your Step-by-Step Guide to Brewing the Perfect Cup
Ready to start brewing? Mastering your stove coffee percolator is far simpler than you might think. With just a few key steps, you can produce a consistently fantastic cup of coffee. The secret is getting the basics right.
This guide walks you through the entire process, with practical tips to help you avoid common pitfalls like bitterness. The goal is a full-bodied, smooth cup, and it all starts here.
Preparing for Your Brew
A little preparation goes a long way. Always start with a clean pot, as leftover coffee oils from your last brew can turn the next one sour. A quick rinse is usually enough for daily use.
Next, your coffee. For stove coffee percolators, a coarse grind is essential. You're aiming for something that looks like coarse sea salt. If the grounds are too fine, they’ll slip through the filter basket, leaving you with a gritty, muddy cup. For the best flavour, always grind your beans just before brewing.
Finally, use fresh, cold, filtered water for a cleaner-tasting coffee. You can use hot water from a kettle to speed things up, but never start with boiling water as it can scald the grounds.
The Brewing Process Step by Step
With everything prepared, you're ready to start. Follow these steps for a perfect cup every time. Getting your measurements right is key, so a good set of scales can be a huge help. You can explore options like the Timemore Basic 2 Scales to ensure your ratios are spot-on.
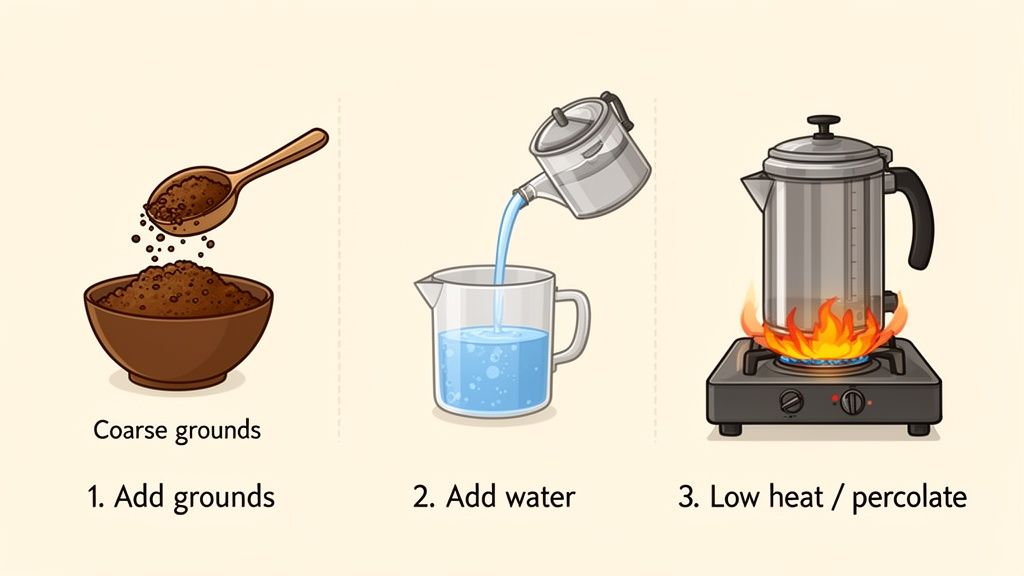
Fill the Pot with Water: Pour your desired amount of fresh, cold water into the percolator's main chamber. A good starting point is about one tablespoon of coarse grounds for every cup (roughly 170ml or 6oz) of water.
Add the Coffee Grounds: Place the pump tube and basket assembly into the pot. Spoon your coarsely ground coffee into the filter basket. Don't press it down; leave the grounds loose so water can flow through them evenly.
Assemble and Heat: Put the spreader lid on top of the basket and secure the percolator's main lid. Place it on your hob over a medium heat.
Watch and Listen for the 'Perc': As the water heats, it will start bubbling into the glass knob on the lid. This is the classic 'perking' sound. Once you see and hear it, turn the heat down to low. You want a gentle, rhythmic bubbling, not a furious boil that will scorch the coffee and create a bitter taste.
The ideal perking time is between 5 and 8 minutes. Any less and your coffee might be weak; any longer and you risk over-extraction, which is the main cause of bitterness. We recommend setting a timer.
Remove from Heat and Rest: Once your time is up, carefully take the percolator off the hob. Let it stand for a minute or two. This allows any stray grounds to settle at the bottom, giving you a cleaner pour.
Serve and Enjoy: Carefully remove the internal basket and tube assembly before you pour. Now you can enjoy the rich, full-bodied flavour you've created, served in your favourite coffee mugs.
Comparing Percolators with Other Brewing Methods
Choosing a coffee maker is easier once you understand the differences between them. How does a classic stove coffee percolator compare against a Moka pot, a drip machine, or an espresso maker?
Each method offers a different experience, from flavour and strength to the daily ritual. This breakdown will show you where the percolator shines and help you decide if its uniquely bold, full-bodied brew is right for you. It's not about finding the "best" method overall, but the best one for you.
Percolator vs Moka Pot
At first glance, stove coffee percolators and Moka pots look similar. Both are iconic stovetop brewers, but they work in completely different ways. A Moka pot uses steam pressure to push hot water through the grounds once, producing a short, intense, espresso-like shot.
A percolator, however, recirculates. It continuously cycles the brewed coffee over the grounds, creating a larger volume of coffee that’s less concentrated than a Moka shot but typically stronger and more aromatic than drip coffee.
Percolator vs Drip Filter Machine
The automatic drip filter machine is a common sight in UK kitchens, loved for its convenience. The water is heated and drips through the coffee once, giving a clean, mild, and consistent cup every time.
A stove coffee percolator demands more attention, but the reward is a much richer and more fragrant brew. The repeated cycle extracts more of the coffee's natural oils and flavours, creating a depth that drip machines cannot match.
It's a trade-off: control vs. convenience. A drip machine offers set-and-forget simplicity, while a stove coffee percolator puts you in control of the final strength and character of your brew.
Percolator vs Espresso Machine
At the high-tech end, you have the espresso machine. It uses immense pressure to force hot water through finely-ground coffee in seconds, creating a concentrated shot with a rich crema.
A percolator is the opposite: a simple, affordable, and durable piece of kit that makes a strong, rustic brew without fancy electronics. While it won't produce a true espresso, it delivers a deeply satisfying and powerful coffee experience for a fraction of the cost and hassle. For those who enjoy experimenting, a device like the versatile AeroPress Coffee Maker is a brilliant way to explore pressure-brewing on an accessible scale.
Which Brewer Is Right for You?
To make the choice clearer, here’s how these methods compare side-by-side. Think about what matters most to you—flavour intensity, speed, cost, or the brewing process itself.
| Feature | Stove Coffee Percolator | Moka Pot | Drip Filter Machine | Espresso Machine |
|---|---|---|---|---|
| Flavour Profile | Bold, full-bodied, very hot | Intense, sharp, espresso-like | Clean, mild, balanced | Concentrated, complex, with crema |
| Brew Strength | Strong to very strong | Very strong | Mild to medium | Extremely strong (in a small shot) |
| Ease of Use | Hands-on, requires monitoring | Fairly easy, but needs practice | Very easy (set and forget) | Difficult, requires skill & practice |
| Brew Time | 6–10 minutes | 4–6 minutes | 5–7 minutes | 25–30 seconds (after warm-up) |
| Cost | Low (£20 – £50) | Low (£20 – £60) | Low to Medium (£30 – £150) | High (£150 – £2000+) |
| Best For | Big, robust cups; camping | Espresso-style coffee without a machine | Convenience and consistency | True espresso and milk-based drinks |
The percolator stands out for its ability to produce a uniquely rich and aromatic pot of coffee, perfect for those who savour a strong, traditional brew and enjoy being part of the process.
How to Clean and Maintain Your Percolator
A clean percolator is the secret to a great-tasting cup of coffee. Over time, coffee oils and hard water minerals build up inside your pot. If left unchecked, they create a bitter, rancid taste that can ruin a perfectly good brew.A simple cleaning routine ensures your stove coffee percolator produces that rich, clean flavour you love. Proper maintenance also extends the life of your brewer; a well-cared-for percolator can last for decades. Let's walk through the daily clean and the occasional deep clean.
Your Daily Cleaning Routine
The best habit you can form is to clean your percolator after every use. This stops flavour-destroying oils from building up and only takes a couple of minutes.
Once the pot has cooled enough to handle safely, just follow these steps:
- Discard the Grounds: Empty the used coffee grounds from the filter basket.
- Disassemble: Take all the components apart—the pot, pump tube, basket, and lid.
- Wash Thoroughly: Wash each part with warm, soapy water using a soft cloth or sponge. Avoid abrasive scourers, as they can scratch the metal.
- Rinse and Dry: Rinse every part well to remove any soap. Let them air-dry completely before reassembling to prevent trapped moisture.
How to Deep Clean Your Percolator
Every few weeks, or if you notice a bitter taste, it’s time for a deep clean. This process gets rid of stubborn oils and mineral deposits (limescale) that a daily wash can't shift. A couple of basic household items work wonders.
Pro Tip: Never use steel wool or abrasive powders on your percolator. These will damage the interior surface, creating scratches where coffee oils can build up and become even harder to remove.
For a specialised approach, professional cleaning liquids are also highly effective. For stubborn stains, a dedicated product like Urnex Clearly Coffee cleaning liquid can restore your pot to a like-new condition.
Using Vinegar for Descaling:
- Fill your percolator with equal parts white vinegar and water.
- Assemble the pot without any coffee grounds.
- Run it through a full brewing cycle on the hob.
- Discard the hot vinegar solution and let the pot cool.
- Wash thoroughly with warm, soapy water to remove any lingering vinegar smell.
Using Bicarbonate of Soda for Stains:
- Add two to three tablespoons of bicarbonate of soda to the pot and fill it with water.
- Run it through a full 'perc' cycle on the hob.
- Once cool, use a soft brush to gently scrub away any remaining stains.
- Rinse well to ensure all the bicarbonate of soda is gone.
Sticking to this simple maintenance schedule will protect your investment and reward you with a perfect, full-flavoured cup of coffee every day.
Choosing the Right Stove Coffee Percolator for You
Picking the perfect stove coffee percolator is your first step towards brewing rich, aromatic coffee. A little know-how goes a long way. Let's break down what really matters: the material, the size, and ensuring it works on your hob.
Choosing the Right Material
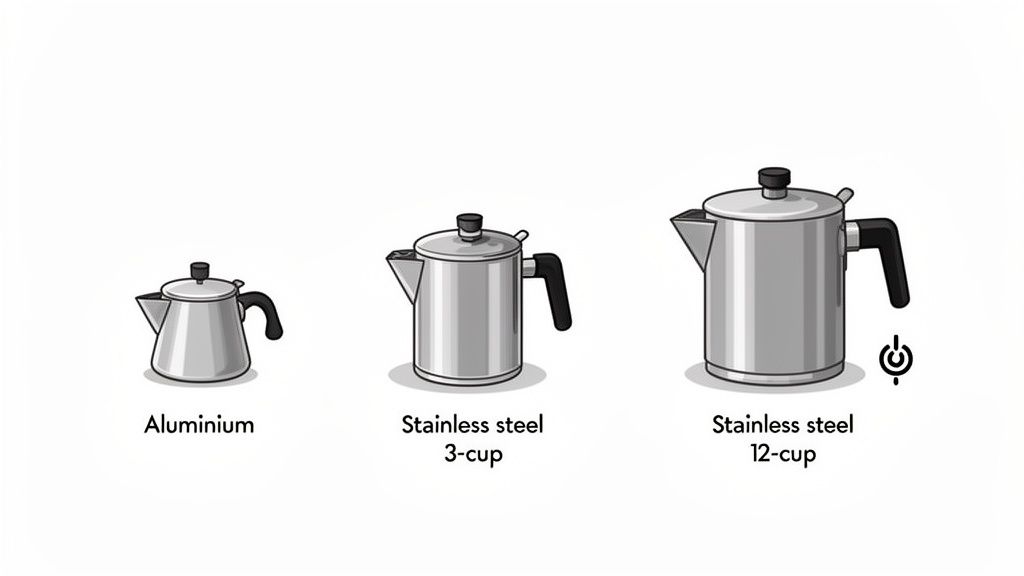
The metal your percolator is made from affects its durability, heating, and even the taste of your coffee. The two main options are stainless steel and aluminium.
- Stainless Steel: Widely seen as the premium choice. It’s incredibly durable, won't rust, and is a non-reactive material, meaning it won’t add a metallic taste to your coffee. Most modern steel pots are also induction-friendly.
- Aluminium: Lightweight and an excellent conductor of heat, aluminium percolators heat up quickly. They are often more affordable, making them a great starting point or option for camping. However, aluminium is softer and can dent more easily.
For a reliable brewer that lasts and keeps your coffee tasting clean, stainless steel is usually the best choice.
Getting the Capacity Right
Stove coffee percolators are usually measured in 'cups', but a percolator 'cup' is smaller than a typical mug, usually around 120-150ml. Think more of a classic teacup.
To pick the right size, think about your daily routine:
- 3-4 Cup Models: Perfect for one or two people.
- 6-8 Cup Models: A great all-rounder for a small household.
- 10-12+ Cup Models: Ideal for larger families or small offices.
A top tip: always choose a size that matches how much you usually brew. Constantly under-filling a large percolator can affect the brewing process and final flavour.
Hob Compatibility Is Key
This is one thing you must check before buying, especially if you have an induction cooktop.
- Gas and Electric Hobs: Both stainless steel and aluminium percolators will work fine.
- Induction Hobs: You must choose a percolator made from a magnetic material, which almost always means stainless steel. Always look for an "induction-compatible" label in the product description.
While not a percolator, if you're after a classic aluminium stovetop for a gas or electric hob, something like the Pezzetti Italexpress Aluminium Stove Top Pot offers a different but equally traditional brewing experience. By weighing up material, size, and hob type, you can confidently pick the perfect percolator for your needs.
Got Questions About Your Percolator?
Getting to grips with a new brewing method always brings up a few questions. To help you master your stove top percolator, we’ve put together straightforward answers to the most common queries.
What’s the Best Coffee Grind for a Stove Coffee Percolator?
You need a coarse grind, with a texture like coarse sea salt. This is vital. If the grind is too fine, the coffee particles will slip through the filter basket holes, resulting in a cup full of sludgy sediment. Fine grounds also extract too quickly in the recirculating brew cycle, making your coffee bitter.
Can I Use a Stove Coffee Percolator on an Induction Hob?
Yes, but the percolator must be made from a magnetic material. Most modern stainless steel percolators are designed to be induction-compatible. Older models or those made from aluminium will not work. Always check the product description for an "induction-compatible" label before buying.
Why Does My Percolated Coffee Taste Bitter?
Bitterness is the most common pitfall, but it's easily avoided. It is almost always caused by over-extraction (brewing for too long) or water that is too hot. As soon as you hear the 'perking' sound, turn the heat down to a low simmer. A furious boil will scorch the grounds. Aim for a brewing time of just 5-8 minutes for rich flavour without bitterness.
How Do I Know When My Percolator Coffee Is Ready?
Your best clues are sound and sight. Brewing has started when you hear the rhythmic 'perking' sound and see dark liquid bubbling into the glass knob on the lid. Watch the colour of the liquid; it will gradually darken as the brew strengthens. A good rule of thumb is to let it perk for 5-8 minutes after you first see the bubbling. Use a timer and experiment to find the perfect strength for your taste.
Ready to start your journey with a classic and satisfying brewing method? ADS Coffee Supplies is rated number one for our curated selection of high-quality coffee equipment, beans, and all the accessories you need.
Explore our full range of coffee brewing gear at ADS Coffee Supplies


