
Properly steaming milk turns a good coffee into a great one. It's the craft of creating glossy, velvety microfoam that transforms a simple espresso into a rich latte or a decadent cappuccino. This guide provides practical, actionable advice on how to steam the milk perfectly every time, a crucial skill for any coffee enthusiast or café owner.
Why Perfectly Steamed Milk Matters
Mastering the steam wand isn't just for show; it's a core barista skill that directly shapes a drink's flavour, texture, and appearance. When you get it right, you heat the milk to its sweetest point while creating a silky-smooth microfoam that marries perfectly with espresso. This isn't about creating stiff, bubbly foam—it's about making liquid velvet.

The Science of Sweetness and Texture
So, what actually happens inside the jug? Steaming is a two-part process: introducing air (stretching) and heating the milk while creating a vortex (texturing). This combination breaks down the milk's fats and proteins in a wonderful way.
- Proteins: Heat makes milk proteins unravel. They then wrap themselves around the tiny air bubbles you've introduced, creating a stable, silky foam.
- Fats: Fat molecules are the heroes of mouthfeel, giving the final drink that creamy, luxurious quality we all crave.
- Sugars: As milk heats up, its lactose converts into simpler, sweeter-tasting sugars. The magic happens around 60-65°C, where the milk is at its most delicious without being scalded.
Understanding this balance is everything. If you overheat the milk, you destroy the proteins and burn the sugars, leaving a flat, bitter-tasting drink. This is why a quality stainless steel foaming jug and a consistent technique are so vital.
A Competitive Edge in the UK Coffee Scene
In the UK's bustling coffee shop market, getting milk right has become a cornerstone for success. The market has exploded to over £6.1 billion in turnover, with coffee shops accounting for 7.1% of all money spent eating out. This growth underlines why a barista's ability to perfectly steam milk is essential for any business wanting to stand out.
How to Choose Your Milk Steaming Toolkit
Before you can pour the perfect flat white, you need the right gear. This isn’t about having the flashiest setup, but about using reliable, effective tools that give you control and consistency. Your equipment is the foundation for turning cold milk into silky, glossy microfoam.
It all starts with the espresso machine’s steam wand. This is the workhorse, delivering the powerful, dry steam needed to heat and texturise the milk. The design of the steam tip—especially the number and angle of its holes—hugely impacts the steam’s force and direction, helping you create that perfect, swirling vortex in the jug.
Essential Tools for Steaming Milk
While the steam wand brings the power, a couple of other bits of kit are non-negotiable for consistent, high-quality results.
The Stainless Steel Milk Jug: A good quality stainless steel jug is vital. Steel is a great heat conductor, letting you feel the temperature building as you hold it. A jug with a sharp spout, like this straight-sided milk foaming jug, is what you need to get a rolling vortex going.
A Reliable Thermometer: While experienced baristas often work by feel, a clip-on thermometer is an invaluable tool for consistency. It removes the guesswork, helping you nail that 60-65°C sweet spot every single time. It’s your best defence against overheating the milk and creating a burnt flavour.
Getting your toolkit right from the start makes the whole process easier. It removes guesswork, letting you focus purely on refining your technique for the perfect pour.
A Step-by-Step Guide to Steaming Milk
This is where the craft begins. To consistently steam milk for a perfect coffee, you need a repeatable technique built on two core phases: stretching and texturing. This is a practical, hands-on skill that delivers glossy, paint-like microfoam every time.
The entire process hinges on controlling the introduction of air and then smoothly incorporating it. This visual guide breaks down the essential tools involved.
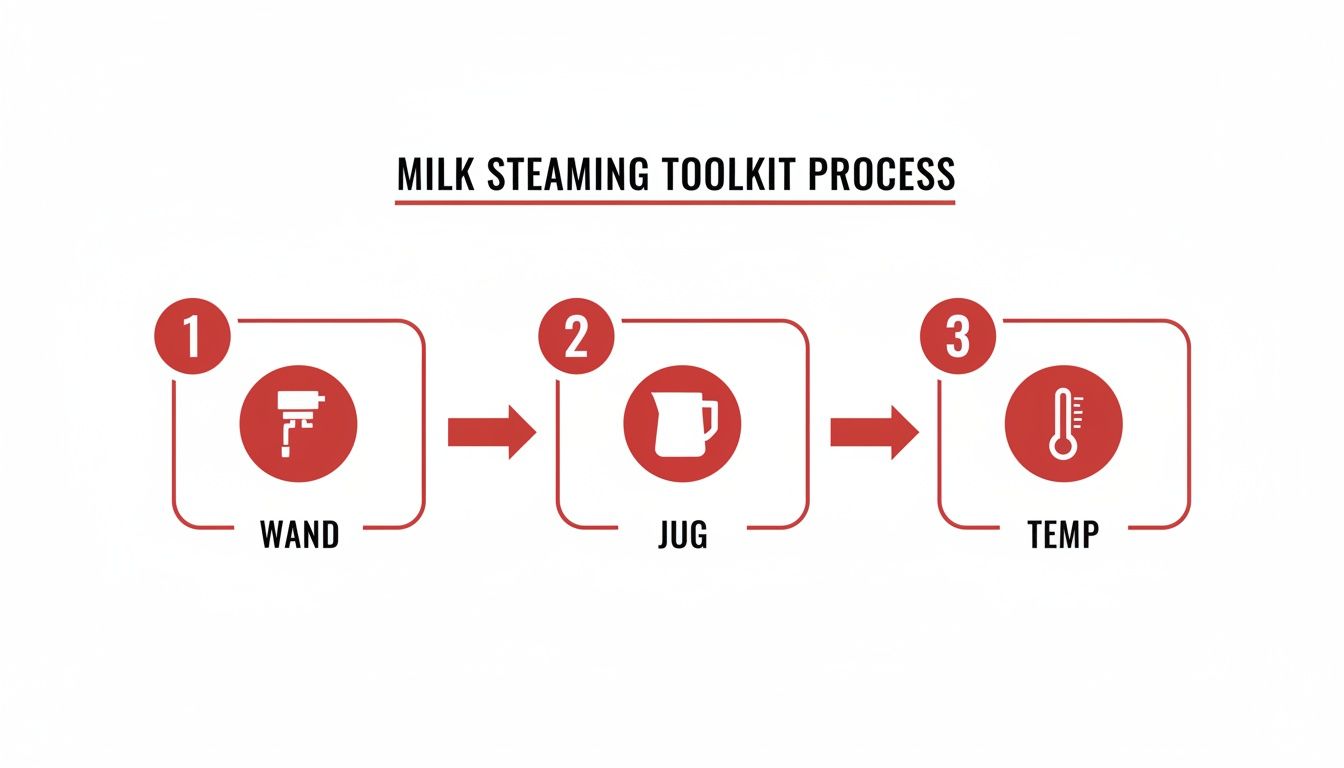
This flow shows how the steam wand, milk jug, and thermometer work together to achieve the ideal result. Each piece of kit plays a critical role in the final texture and taste of your steamed milk.
Phase One: Stretching the Milk to Introduce Air
The first phase, known as stretching or aerating, is all about adding air to create volume and build the foundation for your foam. The goal is to get this done quickly and with control while the milk is still cold.
- Position the steam wand's tip just below the surface of the cold milk, slightly off-centre.
- Open the steam valve and listen for a gentle, consistent 'hissing' or 'tearing' sound. This is the sound of air being drawn into the milk.
- Watch the milk's volume increase. For a latte, you only need a brief stretch. For a cappuccino, you'll stretch for longer to build more foam.
If you hear a loud screeching noise, the wand is too deep. If you get large, soapy bubbles, it's too close to the surface. That gentle hiss is your signal that you're getting it right.
Phase Two: Texturing the Milk to Create Silkiness
Once you've stretched the milk to the desired volume (usually a 20-30% increase), it’s time for texturing. This is where you integrate the air to create a uniform, silky microfoam.
To start texturing, simply lower the steam wand deeper into the milk. This stops the hissing sound and should create a powerful swirling vortex. This whirlpool motion is crucial—it folds larger air bubbles into the milk, breaking them down into microscopic bubbles.
The perfect vortex should look like a smooth, rolling wave inside the jug. This motion ensures the milk is heated evenly while refining the texture into a glossy liquid. Keep this vortex going until the milk reaches its target temperature. A thermometer like the Rhinoware Digital Beeping Thermometer can be programmed to alert you just before you hit the perfect temperature.
Ideal Milk Temperatures and Textures
Use this quick reference for getting the temperature and texture spot-on for the UK’s most popular drinks.
| Drink Type | Target Temperature (°C) | Foam Level | Best Practice Tip |
|---|---|---|---|
| Latte | 60-65°C | Light (1cm) | Stretch for just a few seconds, then focus on a long, smooth vortex for a silky finish. |
| Cappuccino | 60-65°C | Medium (2-3cm) | Stretch for longer to incorporate more air before creating the vortex. The foam should be dense. |
| Flat White | 55-60°C | Very Light (<0.5cm) | Minimal stretching is needed. The aim is for a velvety texture with almost no visible foam. |
| Hot Chocolate | 65-70°C | To preference | Heat slightly higher to melt chocolate powder. Texture can be adjusted to customer liking. |
Of course, steaming milk is just one piece of the puzzle. For a complete overview, read about how to brew peak performance coffee.
How to Steam Different Types of Milk
Not all milks are created equal when they meet a steam wand. Understanding how different milks behave—from dairy to plant-based alternatives—is what separates a good barista from a great one. The milk you choose has a huge impact on the final texture, flavour, and look of the drink.
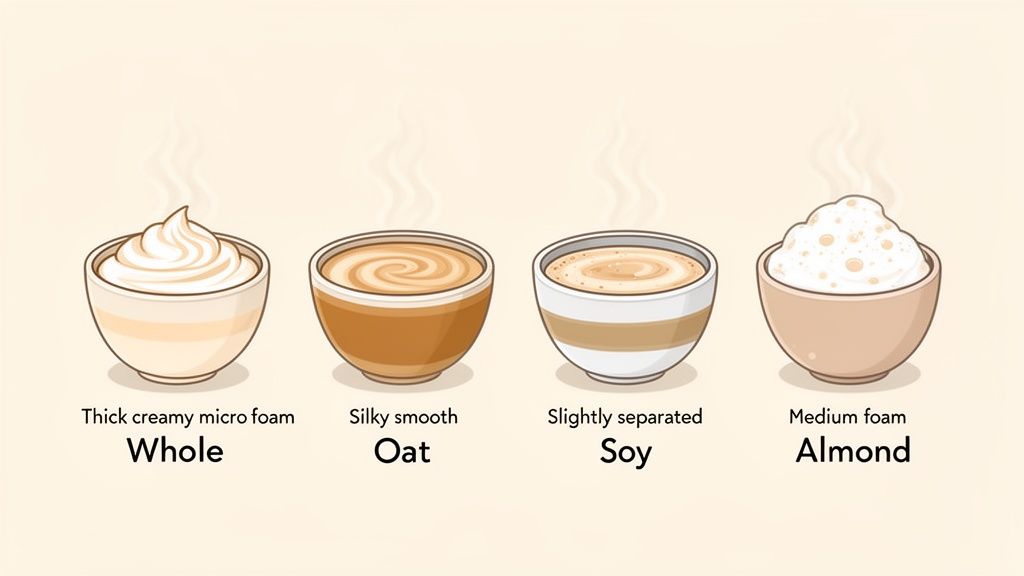
Whole dairy milk is the gold standard for a reason. It has the perfect natural balance of fat, protein, and sugar to create beautiful, glossy microfoam. The fats give it a rich mouthfeel, while the proteins build a strong, silky foam structure ideal for latte art.
As you drop to semi-skimmed or skimmed milk, the lower fat content changes things. The foam becomes lighter and more voluminous, but you lose that creamy texture. Skimmed milk can create a very stiff, dry foam if you’re not careful.
Working with Plant-Based Alternatives
The demand for plant-based milks has exploded, so every barista needs to know their way around them. Each one brings its own unique character and requires a slightly different touch.
- Oat Milk: A firm favourite in UK cafés. Its naturally high sugar content creates a creamy texture and sweetness that works well with coffee. It steams beautifully, often behaving like whole dairy milk.
- Soy Milk: Soy has a high protein content that can create a thick, stable foam. The main watch-out is curdling; it can split if overheated or mixed with highly acidic coffee.
- Almond Milk: This one can be tricky. Almond milk is lower in protein and fat, which often results in a thinner foam that separates quickly. Look for ‘barista blend’ versions with added stabilisers.
A great tip for all plant-based milks is to steam them to a slightly lower temperature than dairy, around 55-60°C. This helps prevent them from splitting. Many suppliers now offer fantastic dairy-free powders, like Nomou vegan milk powder, which are formulated for great steaming performance.
Tips for Consistent Results with Any Milk
A few golden rules always apply. Always start with very cold milk straight from the fridge, as this buys you more time to build texture. It’s also non-negotiable to use a dedicated, clean jug for each milk type to prevent cross-contamination for customers with allergies.
The principles are surprisingly similar to those found in guides on choosing a dairy free milk substitute baking. Ultimately, practice and small adjustments will give you the confidence to steam the milk your customers ask for.
Solving Common Milk Steaming Problems
Even seasoned baristas have off days where the milk refuses to cooperate. Most issues have a surprisingly simple fix. More often than not, the problem is a tiny detail in your technique, not your machine.
Why is my milk too bubbly and soapy?
This is a classic sign of over-aeration. It happens when you keep the steam wand tip too close to the milk's surface for too long, creating big bubbles instead of incorporating air gently.
To fix this, shorten your 'stretching' phase. You only need to introduce air for a few seconds—just long enough to hear that gentle hissing sound. Then, submerge the wand deeper to start the texturing vortex.
Why is my milk thin and watery?
If your milk is hot but lacks body, you’ve likely under-aerated it. This means you plunged the wand too deep, too soon, stopping any air from getting in. Without that initial stretch, you're just heating the milk.
The solution is to keep the wand tip positioned just below the surface for the first few seconds of steaming. Listen for that distinct, gentle tearing sound before you lower the wand to create the whirlpool. For a latte, aim for a 20-30% volume increase during stretching.
Why does my milk taste burnt or eggy?
This means you’ve overheated the milk. Once milk gets hotter than 70°C, its proteins break down, releasing sulphuric compounds. This process kills the silky texture and creates an unpleasant, burnt taste.
The fix is simple: use a thermometer. Aim to cut the steam off when the milk hits 60-65°C. The temperature will continue to climb a few degrees after the steam is off, so stopping just shy of your target preserves its natural sweetness.
How to Keep Your Steam Wand Clean and Ready
Great coffee depends on impeccably clean equipment. Cleaning the steam wand after steaming milk isn't just a good idea—it's a non-negotiable step that protects the flavour of the drink and the health of your machine. A dirty wand can instantly introduce sour, old milk notes into a coffee.
The routine is simple but critical: purge and wipe the wand immediately after every single use. A quick blast of steam clears out any milk inside the tip, and a swift wipe with a dedicated damp cloth removes residue before it can bake on.
End-of-Day Deep Clean
While the purge-and-wipe is your go-to move after every drink, a more thorough clean at the end of the day is essential. Over time, milk solids can bake onto the wand and create a stubborn deposit known as milk stone, which can block the steam holes.
Follow this simple end-of-day routine:
- Soak the Wand: Submerge the steam wand in a jug of hot water mixed with a specialised milk cleaner for about 20 minutes.
- Wipe and Purge: After soaking, give the wand a thorough wipe down. Finish with a few powerful purges to blast out any remaining gunk.
This simple daily habit keeps your machine running efficiently. Using professional products like Urnex Rinza cleaning tablets is a fantastic way to keep your steam wand in top condition.
Milk Steaming FAQs
Every barista runs into a few snags when they're learning to steam milk. Here are quick answers to the questions we hear most often.
Why is my milk not getting frothy?
This usually boils down to two things: not getting enough air in at the start, or using milk that isn’t cold enough. Always start with fresh, cold milk from the fridge. Then, make sure you hear that "hissing" sound for the first few seconds of steaming to introduce air.
What is the ideal temperature for steamed milk?
For dairy milk, the magic number is 60-65°C (140-150°F). In this range, the milk is at its absolute sweetest. Push it any hotter and you risk scalding it, which creates a burnt flavour and destroys the texture.
Can I re-steam milk that has already been heated?
In a word: no. Re-steaming milk is a bad idea. You're heating proteins that have already broken down, making it chemically impossible to get a good texture a second time. Always use a fresh, cold portion of milk for every drink.
What’s the difference between foam for a latte and a cappuccino?
It all comes down to how long you introduce air (the "stretching" phase). For a cappuccino, you want a deep layer of foam, so you'll stretch the milk for longer to create more volume. For a latte or flat white, you want silky microfoam, which requires much less stretching and more time spent texturing.
Ready to perfect your coffee craft? Allied Drinks Systems has all the barista tools, from professional foaming jugs to precision thermometers, to help you steam milk like a pro. Explore our full range of barista supplies.


