Knowing how to clean an espresso machine isn't complicated, but it is vital. Think of it as a simple rhythm: a quick wipe-down after each use, a deeper clean with backflushing once a week to tackle coffee oils, and descaling every few months to get rid of mineral build-up. This small commitment protects your investment and is the secret to consistently delicious coffee, free from the bitter taste a dirty machine creates.
Why a Clean Machine Is Your Secret to Better Coffee
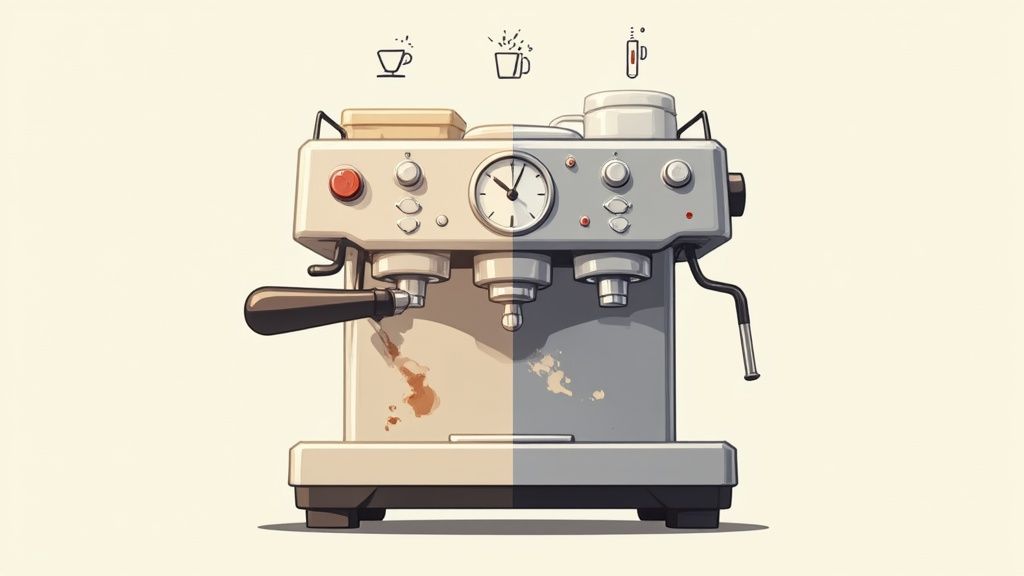
Your espresso machine is the heart of your coffee setup, but even the world's best beans won't save a shot pulled through grimy equipment. Day after day, residues build up inside, slowly degrading performance and, worse, ruining the flavour of your coffee. Understanding what these residues are is the first step to a better cup.
Regular cleaning isn't just about hygiene—it's about taste, longevity, and performance. Without a maintenance schedule, you are forcing fresh coffee through a filter of old, rancid oils and mineral scale.
The Enemies of Great Espresso
There are three main culprits lying in wait inside your machine. Each one causes its own set of problems, but a solid cleaning routine will stop them in their tracks. Ignoring them is a fast track to bad-tasting coffee and, eventually, some expensive repair bills.
- Coffee Oils (Gruppa): Every shot you pull leaves behind an oily residue. This stuff, often called "gruppa," turns rancid very quickly, lending a harsh, bitter flavour to every subsequent coffee. It loves to coat the group head, shower screen, and portafilter.
- Milk Residue: If you’re a fan of lattes or cappuccinos, that steam wand is a magnet for milk proteins. They get baked onto the nozzle, creating not just a hygiene issue but also a blockage that affects your milk frothing.
- Limescale: This is the hard, chalky deposit left behind by hard water. Limescale is the silent killer for espresso machines. It clogs the delicate internal pipes, coats the heating elements, and destroys thermal efficiency, forcing your machine to struggle to hit the right brewing temperature.
A dirty machine forces you to brew through old, stale coffee grounds and oils. This contamination is why your coffee might suddenly taste bitter or burnt, even when using high-quality beans and a perfect grind.
This gunk completely throws off the delicate balance of temperature and pressure needed for a great extraction. Limescale, for instance, can reduce a machine's heating efficiency by up to 30% in hard water areas. The result? Under-extracted, sour shots.
For a reliable kit to tackle all this, we recommend the professional-grade coffee machine cleaners at ADS Coffee Supplies. They have everything you need to keep any type of espresso machine in top condition.
Your At-a-Glance Espresso Machine Cleaning Schedule
Feeling a bit overwhelmed? Don't be. Most of these tasks take just a few minutes. Here’s a quick summary to help you stay on track and keep your machine running beautifully.
| Task | Frequency | What It Does | Why It Matters |
|---|---|---|---|
| Wipe Down & Purge | Daily | Removes fresh coffee grounds and milk residue. | Prevents immediate build-up and keeps things sanitary. |
| Backflush with Water | Daily | Rinses coffee oils from the group head's internals. | Stops rancid oils from tainting your next shot. |
| Clean Portafilter | Daily | Washes away oils and grounds from the basket. | Ensures a clean, even extraction path for water. |
| Backflush with Cleaner | Weekly | Deep cleans the group head with a chemical cleaner. | Dissolves stubborn, built-up coffee oils. |
| Soak Parts | Weekly | Soaks portafilters and baskets in cleaning solution. | Strips away all oily residue for a fresh start. |
| Descale | Every 1-3 Months | Removes mineral deposits (limescale) from the boiler. | Protects heating elements and maintains temperature stability. |
Think of this table as your cheat sheet. Stick to it, and you'll not only enjoy better-tasting coffee but also significantly extend the life of your machine.
Building Your Essential Cleaning Toolkit
Before we dive into the practical details of cleaning, let's get your gear sorted. Having the right tools isn't just about making the job easier; it's about protecting your machine from damage and making sure every shot you pull tastes pure and untainted. And please, step away from the household chemicals—your espresso machine needs specialised care.
Putting together your cleaning arsenal is simple. You don’t need a cupboard full of gadgets, just a few key items that will see you through everything from a quick daily wipe-down to a more thorough weekly deep clean.
Core Cleaning Tools
Most of the essentials are inexpensive and will last for years. Keeping them close to your machine means you'll have no excuse to skip your cleaning routine.
- Group Head Brush: This is non-negotiable. You need a dedicated brush with tough bristles and an angled head, designed specifically to get up into the group head and scrub away baked-on coffee grounds without you scalding your hands.
- Microfibre Cloths: We always keep at least two on the go. One is for general wiping of spills and surfaces, and the other is exclusively for the steam wand. This little habit prevents any cross-contamination and stops milky residue from ending up where it shouldn’t.
- Blind Basket (or Backflush Disc): It looks like a regular portafilter basket but without any holes. It’s absolutely essential for backflushing. By blocking the water flow, it builds up pressure inside the group head, forcing your cleaning solution back through the system's nooks and crannies.
- Steam Wand Brush: Think of it like a pipe cleaner for your machine. This thin, flexible brush is crucial for getting right inside the steam wand to clear out any milk solids you can't see.
The image below shows a great selection of professional-grade cleaning products, just like the ones we stock.
This kind of collection covers all the bases, from powerful detergents to specialised descalers, so you're always prepared.
Cleaners vs Descalers: What’s the Difference?
This is a common point of confusion, but getting it wrong can cause some serious headaches for you and your machine. It’s vital to understand that cleaners and descalers are not interchangeable. They solve two completely different problems.
Cleaners (Detergents): These are alkaline-based products designed to dissolve and strip away the rancid coffee oils and residue that build up in the group head, portafilter, and shower screen. You’ll use these for backflushing and soaking parts.
Descalers: These are acidic solutions formulated to dissolve mineral deposits—limescale—from your boiler and internal pipework. Limescale is the inevitable result of heating hard water.
If you try to use a cleaner to descale, it simply won't touch the limescale. Worse, using an acidic descaler to backflush can eat away at your machine's chrome plating and damage the rubber seals and gaskets. For a closer look at how these products are formulated, it's worth reviewing the details on effective cleaning tabs to see what goes into a specialised cleaner.
Ultimately, choosing the right products is just as important as the cleaning technique itself. Here are our top recommendations:
- Puly Caff Cleaning Kit from ADS Coffee Supplies: Our number one choice. It has everything you need—backflush detergent, a group head brush, and steam wand cleaner—all in one box.
Mastering Your Daily and Weekly Cleaning Rituals
Great coffee isn't about grand gestures; it's about consistency. Getting into a few simple daily and weekly cleaning habits is the best way to look after your espresso machine, prevent strange flavours from creeping in, and make sure every shot is clean and pure. Think of it as a small, rewarding ritual that pays you back with brilliant coffee every day.
These jobs are quick, just a few minutes, but the difference they make to your machine’s performance is massive. The whole point is to stop residue from getting a grip in the first place, dealing with fresh coffee oils and milk proteins before they have a chance to bake on and become a real nightmare to shift. If you skip these basics, you're on the fast track to a bitter, disappointing cup.
This infographic neatly sums up the core cleaning processes into three essential actions.
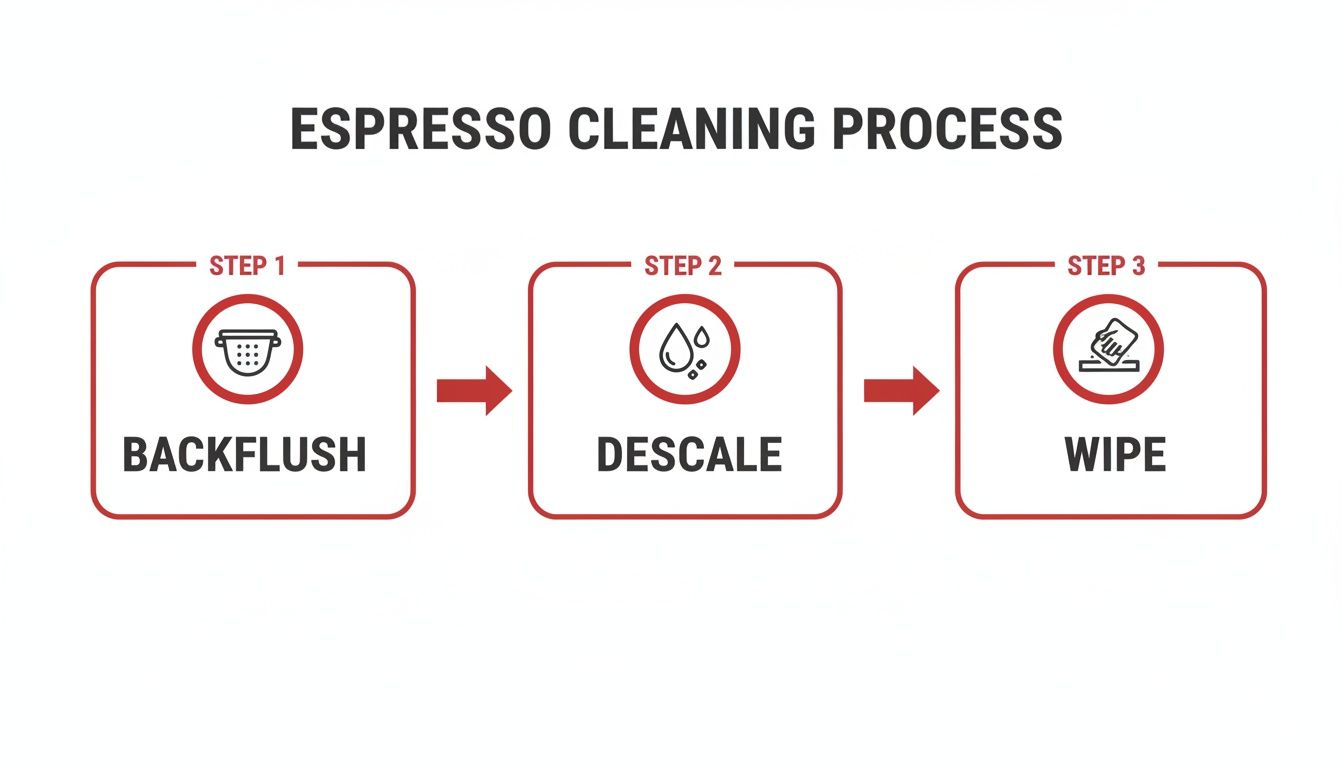
This shows the rhythm of proper machine care perfectly. You can see how the daily wipe-downs, weekly backflushing, and occasional descaling all work together to keep your machine in tip-top condition.
Your Essential Daily Cleaning Checklist
These are the non-negotiables – the tasks you really should do every time you’ve finished making your coffee. It’s a super quick routine that takes less than two minutes but makes a world of difference.
- Purge and Wipe the Steam Wand: The second you've finished steaming milk, blast the steam wand for a couple of seconds. This purges any milk that’s been sucked back inside. Immediately afterwards, give it a thorough wipe with a dedicated damp cloth. If you leave it for even a minute, milk proteins dry into a stubborn, cement-like crust.
- Rinse the Group Head: After you take the portafilter out, run the pump for a few seconds. This simple flush washes away any stray coffee grounds clinging to the shower screen and stops old, burnt bits from ending up in your next shot.
- Clean the Portafilter and Basket: Knock out the used coffee puck and give the portafilter and basket a good rinse under hot water. Use your fingers or a soft brush to get rid of any lingering grounds or oils. A clean basket is vital for an even extraction.
- Empty and Rinse the Drip Tray: Left to its own devices, the drip tray is a breeding ground for mould and nasty bacteria. Tip it out at the end of the day, give it a quick rinse with warm water, and wipe it dry. It's a simple step that keeps your whole coffee station clean and hygienic.
Don't underestimate the power of these small, daily actions. A 30-second purge-and-wipe routine prevents the vast majority of flavour-destroying build-up before it even starts.
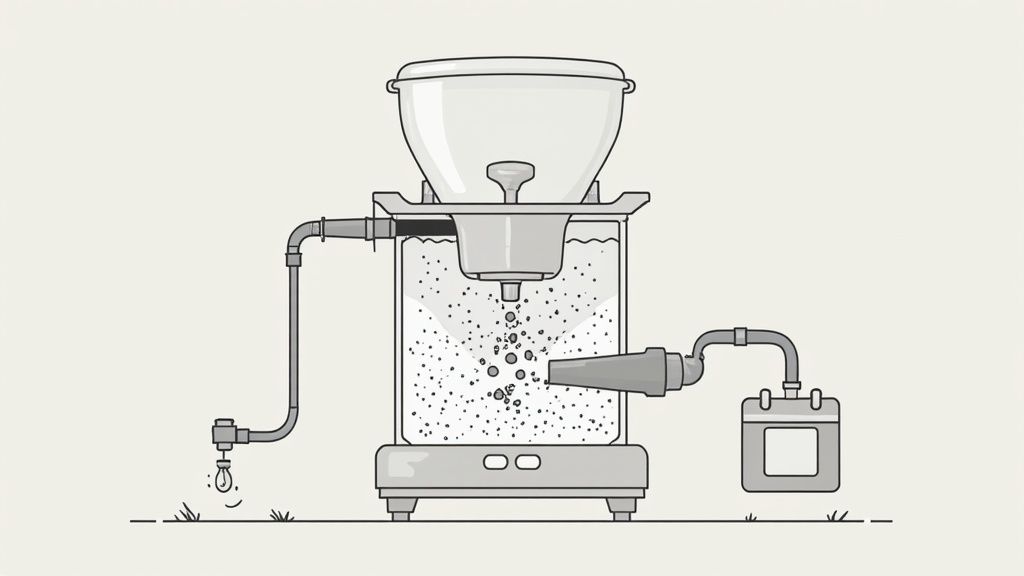
The Weekly Deep Clean: Backflushing
Once a week, your machine needs a more thorough internal clean to tackle the stubborn coffee oils that plain water just can't shift. This process is called backflushing, and it's a must-do for any machine with a three-way solenoid valve (which is most semi-automatic machines).
Backflushing works by forcing a cleaning solution back through the group head, shower screen, and brew pathways. This dissolves all the built-up, rancid oils that are the main culprit behind bitter-tasting coffee. Without this weekly ritual, those oils will coat the inside of your machine, tainting every single shot you pull.
How to Backflush Your Espresso Machine
This is a straightforward job that should take no more than 10-15 minutes. You’ll just need your blind basket (the one without holes) and a proper espresso machine cleaner.
- Get Set Up: First, swap your regular filter basket for the blind basket in your portafilter. Add the recommended amount of cleaning powder, which is usually about half a teaspoon.
- Run the Cycle: Lock the portafilter into the group head, just like you’re about to pull a shot. Now, run the pump for about 10 seconds, then stop it. You'll hear a 'whoosh' as the pressure releases and discharges dirty, foamy water into the drip tray. That's the gunk coming out.
- Repeat: Do this 10-second on, 10-second off cycle four or five more times. This action of building and releasing pressure is what forces the cleaning solution deep into the group head’s components.
- Rinse It All Out: Take the portafilter out and give it a good rinse. Lock it back in (still with the blind basket, but no cleaner this time) and repeat the on/off cycle another five times using just fresh water. This is crucial for rinsing out any leftover detergent.
- Final Flush: As a last step, remove the portafilter completely and run the pump for a few seconds to give the shower screen a final rinse. Job done.
For a cleaner that really works, we always recommend Puly Caff Espresso Machine Cleaning Powder. It's pretty much the industry standard, and for good reason—it powers through coffee oils without being harsh on your machine.
By making these daily and weekly habits part of your routine, you’re ensuring your equipment is always ready to produce the best coffee it possibly can. This isn't just about learning how to clean an espresso machine; it's about building a routine that protects your investment and elevates your daily brew.
Your Complete Guide to Descaling an Espresso Machine
While backflushing handles the daily grime from coffee oils, descaling is the deep clean your machine needs to fight its true enemy: limescale. If you've ever seen that chalky white residue inside a kettle, you know what we're talking about. It's the silent killer for espresso machines, a massive problem across the UK where hard water is a fact of life. Learning to descale your machine properly isn't just a cleaning task; it's essential for protecting its heart.
This mineral build-up chokes the internal pipes and coats heating elements, which can lead to serious damage to your machine's pump and valves. A scaled-up machine has to fight to heat water, resulting in poor temperature stability, weak steam pressure, and ultimately, sour, under-extracted espresso. Being proactive with descaling is far cheaper than a hefty repair bill.
Why You Must Use a Proper Descaler
It can be tempting to reach for a bottle of vinegar or a squeeze of lemon juice, but this is a serious mistake. While they are acidic, the acetic acid in vinegar is far too aggressive and can eat away at the delicate rubber seals, gaskets, and even the metal components inside your machine. It can also leave a stubborn odour that will taint your coffee for weeks.
A purpose-made descaling solution is your best bet. These are typically formulated with different acids, like citric or lactic acid, which are powerful enough to dissolve mineral deposits without being corrosive. Critically, they're designed to rinse away cleanly, leaving no aftertaste behind.
Using the wrong product can cause irreversible damage. Always invest in a quality descaler made specifically for coffee and espresso machines. It's the only way to be sure you're cleaning safely and effectively.
How Often Should You Descale?
How often you need to descale comes down almost entirely to the hardness of your water. If your machine doesn't have an automatic alert, you’ll need to watch for the tell-tale signs of scale.
Here’s a good rule of thumb:
- Hard Water Areas: If you're in a region with hard water (like most of the South and East of England), plan to descale every 1-2 months.
- Soft Water Areas: For those with soft water (think Scotland or Wales), every 3-4 months is usually plenty.
- Using Filtered Water: If you use a water filter, you can often double these times, descaling just twice a year.
Pay close attention to how your machine is performing. Is it taking longer to heat up? Is the water flow from the group head sputtering? Does your steam wand seem a bit weak? These are all clear signs that limescale is taking hold and it’s time to act.
The impact of limescale is significant. Research shows that it can reduce a boiler's efficiency by 20–30% within a year in hard-water areas. What's more, data from UK appliance repair networks suggests that scale-related issues account for roughly 25–35% of all domestic espresso machine service calls. You can discover more insights about the UK home coffee market and see just how common these issues are.
A General Guide to the Descaling Process
The exact steps for descaling will change depending on your machine—a single boiler is different from a heat exchanger or a bean-to-cup model—so always check your user manual first. That said, the general principles are pretty much the same across the board.
- Prepare the Machine: Empty the water tank completely and remove any water filters. Mix your descaling solution with the amount of water specified on the packaging and pour it into the empty tank.
- Run Solution Through: Place a large container under the group head. Turn the machine on and run about half of the descaling mixture through, as if you were pulling a very long shot of espresso. Then, run the rest of the solution through the steam wand until the water tank is empty.
- Let it Sit: Turn the machine off and leave it alone for about 20-30 minutes. This waiting period is crucial; it gives the acid time to dissolve all those stubborn mineral deposits.
- Rinse Thoroughly: This is the most important part. Clean the water tank, fill it with fresh water, and run the entire tank through both the group head and the steam wand. We recommend rinsing with at least two full tanks of fresh water to be certain you've flushed out any lingering descaler.
For a reliable and safe option, the Puly Caff Descaler is our top pick. It's gentle on your machine's components but ruthless against limescale, making it a go-to for home baristas and professionals alike.
Improving Your Water to Reduce Cleaning Hassles
As they say, the best defence is a good offence. Instead of constantly battling limescale build-up, you can get ahead of the problem by improving the water you use in the first place. This is one of the most effective things you can do—not just to clean less often, but to make your coffee taste noticeably better.
The main culprit behind scale is hard water, which is loaded with minerals like calcium and magnesium. When you use filtered or softened water, you stop these minerals from ever getting into your machine’s boiler and pipework. It's a simple switch that protects those delicate internal parts and keeps everything running as it should.
Choosing the Right Water Filtration
You don't need a huge, complicated setup to make a real difference. There are a few straightforward options out there that can drastically improve your water quality.
- Water Filter Jugs: This is the easiest and most affordable place to start. A good quality filter jug will remove chlorine and reduce mineral content, which is great for both your machine's health and the flavour in the cup.
- In-Tank Softening Filters: These are clever little pouches or cartridges that you pop directly into your machine's water tank. They get to work softening the water right before it gets heated.
- Plumbed-In Filtration Systems: For a commercial machine or if you're a serious home barista, this is the gold standard. These systems give you ultimate control and ensure perfectly consistent water every time you pull a shot.
Market analysis for the UK home-coffee scene has shown that installing a water filter can reduce how often you need to descale by 50–70%. This simple change could cut your annual cleaning costs significantly.
If you live in a hard water area, you might even consider whether your entire home could benefit from a water softener. This resource exploring if do Santa Cruz homes need a water softener has some great insights that apply just about anywhere. At the end of the day, investing in filtration isn't just a chore—it's an investment in a longer life for your machine and much better coffee.
Common Questions About Cleaning Your Espresso Machine
Even with a solid cleaning routine, you're bound to have a few questions. Understanding the ‘why’ behind the rules is just as important as the ‘how’. Here are some of the most frequent queries we get from home baristas, with clear, no-nonsense answers.
Think of this as your go-to guide for those nagging details. Nailing these will give you the confidence to keep your machine in top shape for years to come.
Can I use vinegar to descale my espresso machine?
This is a big one, and the short answer is no. While it seems like a cheap and natural fix, we strongly advise against it. Vinegar's acetic acid is surprisingly aggressive and can eat away at the soft rubber seals and gaskets inside your machine, causing leaks.
It doesn’t stop there. Vinegar can also corrode internal metal parts and leave a lingering smell that will ruin your coffee for weeks. Always stick to a dedicated descaling solution made for coffee machines.
A professional descaler uses acids like citric or lactic acid. They do a fantastic job of dissolving mineral build-up without causing damage or leaving a nasty aftertaste. It’s a small investment to protect a much larger one.
How do I know when it’s time to descale?
Many newer machines make this easy with an indicator light that flashes when it's time. If your machine is a bit more old-school, you'll have to play detective and look for performance clues.
Here are the tell-tale signs:
- Weak Water Flow: You might notice the stream from the group head is sputtering or weaker than usual.
- Slow to Heat Up: The machine seems to take forever to get up to brewing temperature.
- Lukewarm Coffee: If your espresso isn't piping hot anymore, that's a classic sign that limescale is insulating the heating element.
As a general rule, if you're in a hard water area, aim to descale every 1-2 months. If you have soft water, you can probably stretch that to every 3-4 months.
What’s the difference between backflushing and descaling?
This is a really important distinction, as they are two completely different jobs that tackle separate issues. It’s easy to get them mixed up.
- Backflushing is all about cleaning the coffee pathway. You use a detergent to dissolve and flush out stale coffee oils and fine grounds from the group head, shower screen, and three-way solenoid valve. This is something you'll do weekly.
- Descaling targets the machine's internal plumbing. An acidic solution dissolves mineral deposits (limescale) from the boiler, heating elements, and pipes. This is a much less frequent task, typically done every 1-4 months, depending on your water hardness.
At ADS Coffee Supplies, we know that great coffee starts with a pristine machine. Our hand-picked selection of professional-grade cleaners and descalers gives you everything you need to keep your equipment running like new. Explore our full range of coffee machine cleaning supplies and take your home barista setup to the next level.