Learning how to steam milk is what separates a decent homemade coffee from a truly café-quality latte, cappuccino, or flat white. The technique boils down to two key stages: first, you introduce air to create volume (this is called ‘stretching’), and then you spin the milk into a whirlpool to break down the bubbles into a silky, smooth texture.
Get this right, and you’ll transform your coffee from just a drink into a genuine experience. This guide gives you practical, actionable advice to help you master the process.
The Secret to Silky, Café-Quality Steamed Milk

Ever wondered what separates a flat, bubbly coffee from one with that perfectly smooth, glossy finish you get from a great coffee shop? The answer is all in how you handle the steam wand. It's a skill that takes your coffee-making to a new level, letting you create that velvety microfoam that enhances the flavour of your espresso.
This guide demystifies the entire process, giving you practical, scannable steps whether you’re an aspiring home barista or a seasoned pro. We’re going beyond the basics to get into the technique behind creating that coveted ‘wet paint’ texture. Forget disappointing, thin foam for good.
Why is perfectly steamed milk important?
In the UK, the demand for excellent coffee has never been higher. With around 98 million cups enjoyed daily and 80% of us visiting coffee shops every week, people know what good coffee should taste like.
Achieving the perfect microfoam isn't just for looks; it’s about flavour. Properly steamed milk becomes sweeter and creamier, balancing the intensity of the espresso without overpowering it. This guide is designed to give you the confidence to nail that balance, every single time.
By the end, you’ll know:
- How to choose the right milk and essential barista tools.
- The step-by-step technique for stretching and texturing.
- How to troubleshoot common problems that get in the way of silky results.
From picking the right pitcher at ADS Coffee Supplies, the UK's number one choice for professional equipment, to pouring your first heart, you’ll have the skills you need.
Choosing Your Milk and Tools for Success
Before you even switch on the steam wand, the fate of your flat white is being decided. The milk you choose and the tools you use aren't minor details; they're the foundation of a great steamed milk drink. Getting this right from the start is the most important step towards pouring silky, glossy microfoam.
Your most crucial piece of kit, besides the espresso machine, is the milk pitcher. A stainless steel jug is essential. Steel is brilliant for thermal feedback—you can feel the temperature rising in your hand, which is your best defence against accidentally scalding the milk. The shape is also cleverly designed to encourage a vortex, the swirling motion needed to texture milk evenly.
Pitcher size really matters. A common mistake is using a jug that’s too big or too small. A good rule of thumb is to fill the pitcher to just below where the spout begins. This leaves enough headroom for the milk to expand without spilling over the sides.
The Essential Barista Toolkit
To set yourself up for consistent results, you'll want a few key items. Using the right gear takes the guesswork out of the equation and will speed up your learning.
- 1. A Quality Milk Pitcher: A well-made stainless steel jug is non-negotiable from a supplier like ADS Coffee Supplies. Its balance and spout shape give you better control. For a single latte, a smaller option like this 350ml straight-sided milk foaming jug is perfect for minimising waste.
- 2. A Milk Thermometer: Seasoned baristas go by feel, but a clip-on thermometer is an invaluable learning tool. It guarantees you hit that sweet spot of 60-65°C every time and stops you from overheating the milk, which kills its natural sweetness.
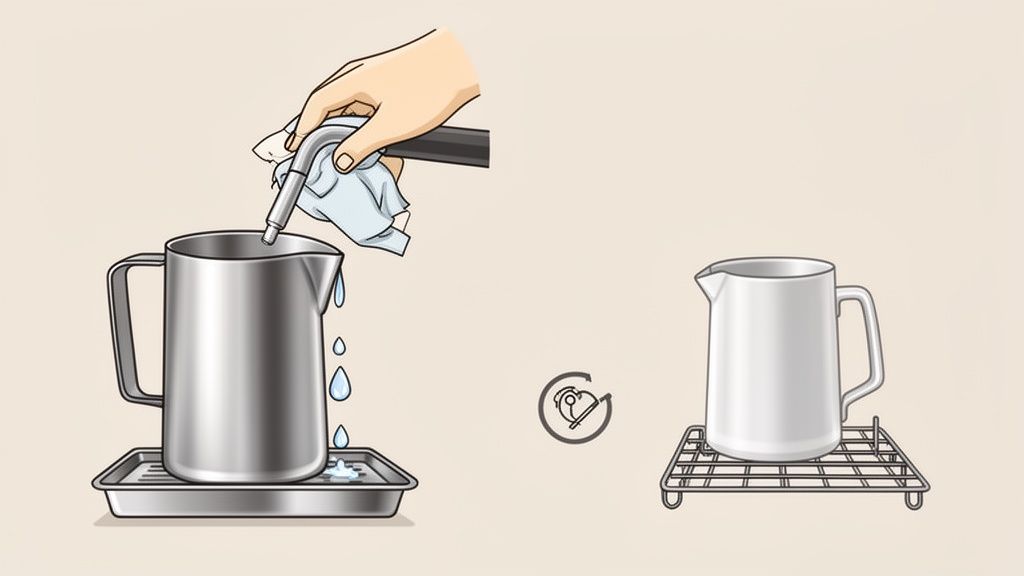
- 3. A Damp Cloth: Keep a clean, dedicated cloth next to your machine. You'll need it to wipe the steam wand the second you finish steaming, preventing old milk from baking on.
Understanding Your Milk Choices
The type of milk you pour into your pitcher has the biggest impact on the final texture and taste. It all comes down to two components: protein and fat. Protein builds the foam's structure, while fat gives it that rich, creamy mouthfeel.
Whole milk is the undisputed champion for steaming. With a healthy amount of both fat and protein (around 3.5% each), it's incredibly forgiving when you're starting out. It creates a stable, glossy microfoam that’s a dream to pour for latte art.
Semi-skimmed milk can create decent foam, but it's less stable due to the lower fat content. The foam tends to be lighter and more "airy"—think old-school cappuccino froth rather than the velvety texture of a flat white.
Working with Plant-Based Milks
Steaming plant-based alternatives brings its own challenges. The secret usually lies in finding a "barista edition" of your favourite milk. These have been formulated with added stabilisers to help them behave more like dairy milk under steam.
Milk Performance Comparison for Steaming
This table breaks down how common milk types perform when steamed, helping you pick the right one.
| Milk Type | Key Characteristic | Foam Texture & Stability | Best For |
|---|---|---|---|
| Whole Milk | High fat & protein | Silky, glossy, very stable | Lattes, flat whites, latte art |
| Semi-Skimmed | Lower fat | Lighter, airy foam, less stable | Traditional cappuccinos |
| Oat Milk | Naturally creamy | Silky & stable (Barista blend) | Lattes, excellent for latte art |
| Soy Milk | High protein | Thick, dense foam, can curdle | Cappuccinos, macchiatos |
| Almond Milk | Low protein & fat | Thin, bubbly foam, dissipates fast | Iced drinks, basic frothing |
Ultimately, practice is key, especially with plant milks. Here's a quick rundown:
- Oat Milk: Often the star performer. It's naturally creamy and steams beautifully, creating a silky microfoam that pours almost as well as whole milk.
- Soy Milk: A classic alternative. Thanks to its high protein content, soy can produce a thick, stable foam. The main watch-out is its tendency to curdle if it gets too hot.
- Almond Milk: This one can be tricky. It’s low in protein and fat, which often leads to a thin foam with big bubbles that vanishes quickly. Patience is needed here.
Mastering How to Steam Milk: A Step-by-Step Guide
This is where the magic happens. Learning how to steam milk is a hands-on skill that turns a simple cold liquid into the sweet, velvety microfoam that’s the foundation of a great latte. The process boils down to two phases: stretching the milk to add air, then texturing it to create a silky finish.
Before you start, there's a vital first step: purging your steam wand. Point it at the drip tray and open the valve for a couple of seconds. You’ll see it spit out condensed water before a powerful, dry steam emerges. Do this every time to avoid adding water to your milk.
Phase One: Aerating to Create Volume ('Stretching')
This stage is about introducing air to create foam. Start by submerging the very tip of the steam wand just below the surface of the milk in your pitcher. Position the tip slightly off-centre to help get a good whirlpool going later. With the wand in place, turn the steam on to full power.
You’re listening for a gentle hissing sound, like ‘tss-tss-tss’. That’s the sound of air being injected correctly. If you hear a loud screech, the wand is too deep. If you see big, ugly bubbles erupting, it’s too shallow.
You only need to stretch the milk for a few seconds. Keep introducing air until the milk has expanded by about a third and the pitcher feels lukewarm to the touch—around 37°C. Now it’s time to perfect its texture.
Phase Two: Emulsifying for Silky Texture ('Texturing')
Once you have enough volume, stop stretching and start texturing. This is where you create the whirlpool. Simply lower the steam wand deeper into the milk, about a centimetre below the surface, but keep it off-centre.
Tilting the pitcher slightly can help the milk start to spin. The aim is to create a strong, rolling vortex. This motion folds the larger bubbles back into the liquid, breaking them down into millions of tiny micro-bubbles, which we call microfoam. This crucial step creates that signature 'wet paint' gloss and silky texture.
As the milk spins, keep a hand on the side of the pitcher as your built-in thermometer. You’re aiming for the moment the jug becomes too hot to comfortably hold for more than a second or two.
Hitting the Perfect Temperature
The sweet spot for steamed milk is between 60-65°C (140-150°F). In this range, the milk’s natural sugars are at their most perceptible, giving it a sweet flavour that pairs beautifully with espresso.
Go any hotter and you’ll scald the milk, which destroys the proteins, collapses your foam, and gives the milk a cooked taste. A thermometer is fantastic when you're learning, but your hand gives you instant feedback.
Once you feel that perfect temperature, turn the steam wand off before you pull it out of the pitcher. This prevents you from blasting big bubbles into your perfectly textured milk. Machines like the Rancilio Silvia V6 E Espresso Coffee Machine offer incredible steam power and control, making this process much easier.
Final Steps Before You Pour
With the steaming done, you’re almost ready. First, place your pitcher on the counter and immediately wipe the steam wand with a damp cloth. Then, purge it one last time to clear out any milk from inside the tip. This is essential for hygiene.
Now, look at your milk. If you see any large bubbles, a firm tap of the pitcher on the worktop will pop them. Finally, gently swirl the milk to 'polish' it. This circular motion fully incorporates the microfoam, giving it a beautiful, uniform sheen like wet paint. Now you're ready to pour.
Pouring Your First Latte Art Designs

You've done the hard part. You’re holding a pitcher of perfectly steamed, glossy milk. Latte art is what turns a great coffee into a memorable one. It starts with three core patterns: the heart, the tulip, and the rosetta. Master these, and you have the foundation for almost any design.
Before pouring, give the pitcher a firm swirl. You’re looking for that 'wet paint' sheen, which tells you the microfoam is perfectly integrated. Don't skip this—it stops the foam from separating.
Setting The Stage for Your Pour
Your initial pour sets up the design. Start by tilting your cup at about a 45-degree angle and pour from a height of 10-15cm above the cup. You want a thin, steady stream aimed at the centre of the deepest part of the espresso. This high pour lets the milk dive under the crema without leaving a white mark. Keep this going until the cup is about two-thirds full.
The Heart: A Simple Classic
The heart is where everyone starts. It’s the perfect pattern for getting a feel for pitcher control.
- Lower and Centre: Once the cup is half-full, bring the spout of your pitcher right down, almost touching the surface of the crema.
- Increase Flow: Speed up your pour slightly. A white dot of foam will appear and expand into a circle.
- Lift and Cut Through: When the circle is the size you want, lift the pitcher, slow the flow, and pull the thin stream straight through the middle of your circle. That’s your heart.
The Tulip: Building Layers
The tulip takes the heart a step further, teaching you how to stack separate 'pushes' of foam to create a layered design.
- First Push: Begin like the heart, creating a circular base of foam. Stop pouring just before it hits the edge of the cup.
- Second Push: Wait a moment, then start a new pour just behind that first circle, nudging it forward. This creates the second 'petal'.
- Final Touches: Repeat for a three or four-layered tulip. Finish by lifting and cutting through all the layers. A jug like the Motta Tulip Milk Jug 500ml helps here, as its spout is designed for precision.
The Rosetta: The Barista Favourite
The rosetta is challenging because it introduces a side-to-side wiggle to create a leaf pattern. Don't worry if this takes a while to click. Start your pour as usual. As soon as you lower the pitcher and white foam appears, start a gentle, rhythmic rocking motion with your wrist.
As you wiggle, slowly pull the pitcher backwards towards the other side of the cup. Once you reach the back, ease off the wiggle, lift the pitcher, and pull a final thin line back through the pattern to create the stem. The secret is a smooth, consistent rhythm.
Solving Common Milk Steaming Problems
Everyone runs into hurdles when learning to steam milk. These issues are universal, and the fixes are usually simple. This section is your troubleshooting guide to turn common mistakes into perfect microfoam.
Why is my foam so bubbly?
Is your milk looking more like a bubble bath than velvety microfoam? This is almost always caused by introducing too much air, too quickly. The fix is about control. Keep the tip of the steam wand just kissing the surface of the milk. Listen for a gentle ‘tss-tss-tss’ sound, not a loud gulping noise.
Quick Fix: If you have a jug of bubbly milk, submerge the steam wand deeper to create a strong vortex. This can sometimes break down larger bubbles and salvage the drink.
Why is my foam thin and watery?
A watery result usually points to one of two things: under-aeration or overheating. If you don't introduce enough air at the start, you simply won't have any foam to work with. Make sure you’re keeping the wand tip near the surface for the first few seconds.
More often, the culprit is heat. If you steam milk past 70°C, the proteins that give the foam its structure break down, and your microfoam collapses into a thin, sad layer.
Milk Steaming Problem Solver
This table is your cheat sheet for identifying what’s gone wrong and how to fix it.
| Problem | Likely Cause | Solution |
|---|---|---|
| Foam is too Bubbly | Over-aerating (stretching for too long or wand is too shallow). | Keep the initial aeration phase short (3-5 seconds). Listen for a gentle hiss, not a loud gulping sound. |
| Foam is too Thin | Under-aerating or overheating the milk past 70°C. | Make sure you introduce air at the start. Stop steaming the moment the pitcher is too hot to comfortably hold. |
| Milk Separates Quickly | Not grooming the milk after steaming. | Immediately after steaming, tap the pitcher on the counter and swirl the milk continuously until it looks like wet paint. |
| No Whirlpool Forms | Incorrect wand placement. | Position the steam wand off-centre and at a slight angle to encourage the milk to spin properly. |
With practice, spotting these issues becomes second nature, and you'll correct them without thinking.
Why does my milk separate instantly?
You’ve steamed a perfect pitcher, but it has separated into hot milk and stiff foam by the time you pour. This happens when textured milk is left to sit still. The solution is simple: groom your milk. As soon as you finish steaming, get that milk moving with a continuous, gentle swirl to keep it integrated.
The Importance of a Clean Steam Wand
A dirty steam wand can subtly ruin your milk texture. Dried milk residue on the tip can disrupt steam flow, leading to inconsistent results and poor hygiene. It is critical to wipe and purge your wand after every single use.
For a deeper clean, a dedicated cleaner is essential. Using a specialised solution like Puly Milk Frother Cleaner regularly will ensure your steam wand delivers powerful, clean steam every time.
Keeping Your Equipment Clean and Ready
Creating consistently silky milk isn’t just about technique—it’s about impeccable hygiene. Mastering the cleaning habits that guarantee quality and safety is the final step in learning how to steam milk like a professional. This is what separates good baristas from great ones.
The most critical habit is cleaning your steam wand the second you're done. Milk residue hardens almost instantly on hot metal, creating a breeding ground for bacteria. A simple two-step process after every use will stop this build-up.
Your Post-Steaming Cleaning Protocol
This is a 'every-single-time' discipline. Make it muscle memory.
- Wipe Immediately: Keep a dedicated, damp cloth by your machine. The moment you pull the wand from the milk, give it a firm wipe.
- Purge Powerfully: Straight after wiping, point the wand at the drip tray and blast the steam for a second or two. This clears any milk from inside the wand tip.
For a broader perspective, this general kitchen appliance cleaning guide offers great context for keeping your entire setup in top shape.
Daily and Weekly Maintenance Routines
A deeper clean is needed to dissolve stubborn milk proteins. At the end of each day, soak the steam wand tip in hot water for 15-20 minutes to loosen residue. Use a pin to ensure the steam holes are clear.
Once a week, use a professional-grade cleaning solution. Deep-cleaning your machine with a product like Urnex Cafiza 2 cleaning powder removes coffee oils and milk residue. Don't forget your pitchers—rinse them straight away and wash them with hot, soapy water.
Common Questions on How to Steam Milk
Got a few nagging questions about steaming milk? Let's run through some of the most common issues baristas face.
Why won't my milk create foam?
This is a frustrating problem, and nine times out of ten, the milk itself is the culprit. If your milk isn't completely fresh, the proteins needed for foam structure have started to break down. Always use the freshest milk you can get. Another cause is not introducing enough air, so ensure the wand tip is just below the surface for the first few seconds.
Can you re-steam milk?
Honestly, it's best to avoid this. When you steam milk a second time, you're cooking it again. This destroys the delicate proteins and sugars, ruining both the texture and the natural sweetness. The result is a flat foam with a burnt taste. Always start with fresh, cold milk.
What is the best milk for latte art?
For pouring beautiful latte art, whole milk is the undisputed champion. Its high fat and protein content create a stable, glossy microfoam that is very forgiving to pour. If you're using plant-based milks, a good quality barista-edition oat milk is your best bet, as it's formulated to behave more like dairy milk under steam.
At ADS Coffee Supplies, we provide everything you need to master your coffee skills, from professional-grade pitchers to espresso machines. Explore our full range of barista tools and accessories to take your coffee to the next level.